Complete wig install tutorial with step-by-step tips for beginners and pro natural results

Beginner-to-Pro Guide to a Natural-Looking wig install Every Time
If you want a step-by-step roadmap that covers tools, preparation, application techniques, maintenance and professional finishing tips, this long-form guide focuses on delivering a seamless wig install experience. Whether you're new to hairpieces or refining salon-level skills, the techniques described here will help you achieve a secure, comfortable and natural outcome that stands up to daily life, travel and events.
Why a proper wig install matters
Many people underestimate how much a careful wig install transforms both the look and longevity of a wig. A correct installation reduces slippage, prevents premature wear, improves natural parting and allows for versatile styling. SEO-conscious readers searching for "wig install" often want practical, repeatable steps; this guide provides that sequence plus troubleshooting and pro tips.
Quick overview: what you will learn
- Tools and prep essential for a clean base
- Application methods: glue, tape, combs and wig caps
- Parting and blending for realism
- Styling and cutting to customize the fit
- Maintenance to keep that fresh install longer
Tools & products checklist for any wig install
Before you start a successful wig install, gather these items: wig cap(s), wig brush/comb, high-quality wig adhesive or tape, alcohol wipes, cotton swabs, edge control gel, heat protectant (for synthetic heat-friendly fibers or human hair), clips, thinning shears, rat tail comb, blow dryer and optional elastic band for extra security. Using the right items reduces mistakes during the actual install and makes post-install styling much easier.
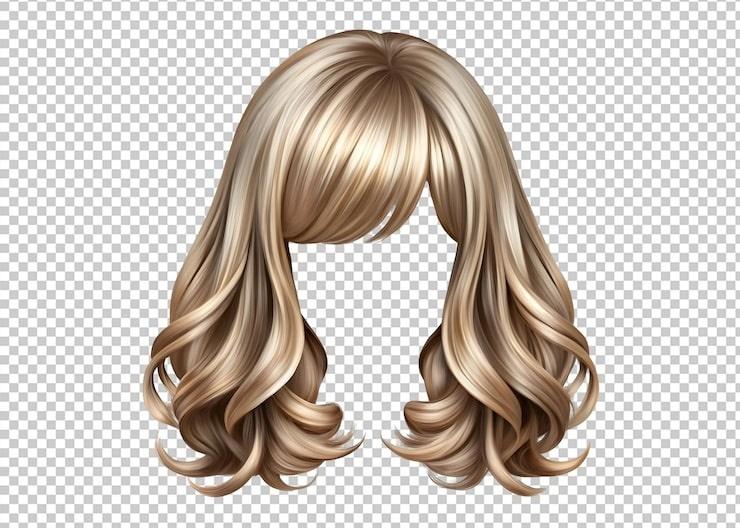
Selecting the right wig for your install
Size, cap construction, density and lace type all affect how you approach the wig install. Lace front wigs require careful front lace preparation and custom cutting for a natural hairline. Full lace wigs provide flexibility for up-dos and off-the-face styling, while 360 lace gives a hybrid of versatility and support. If your goal is a barely-there hairline, prioritize lace front or transparent lace and low-density options for a realistic scalp appearance.
Preparing your natural hair and scalp
Preparation is an underrated stage of a professional wig install. Start with clean dry hair—remove oils, products and sweat with a gentle clarifying shampoo if necessary. Braid, cornrow or flat-wrap hair close to the scalp to create a smooth base. Use edge control to sleek baby hairs and ensure the wig cap lies flat. If you wear the wig long-term, consider scalp care products and give your scalp breathable short sessions between installs to avoid irritation.
Choose the right wig cap
A wig cap matching your skin tone (or slightly lighter) helps the lace blend. Caps come in nylon, mesh or stocking materials. For glue or tape methods, a cap with thin material works best because adhesives adhere properly; for sewing installs, a strong cap or dome cap gives stitch stability. Secure the cap with bobby pins or wig tape and ensure it's wrinkle-free before applying the wig.
Step-by-step wig install methods
Method 1: Quick, removable tape install
1. Clean the hairline with alcohol wipes and allow it to dry.
2. Apply double-sided wig tape along the perimeter where the lace will sit—press tape firmly to skin.
3. Position the wig starting at the front hairline and press the lace over the tape, holding for 30 seconds to ensure adhesion.
4. Tuck and trim excess lace carefully using small, precise cuts; avoid cutting inner hair.
5. Press edges with a blow dryer on low heat to set the bond and smooth with a comb.
This tape method yields a secure but removable solution ideal for intermediate wearers who value convenience and scalp breathing.
Method 2: Glue install for longer wear and sport-proof security
1. Perform a patch test to ensure no allergic reaction to the adhesive.
2. Clean the skin around the hairline with alcohol to remove oils.
3. Apply a thin layer of medical-grade wig glue along the perimeter; let it become tacky (usually 30-60 seconds depending on product).
4. Place the lace gently and press along the glued area section by section; use a cotton swab to press and prevent skin contact with glue.
5. Cut lace close to the hairline after the glue sets, and style as desired.
Glue gives a more permanent fixation versus tape and is preferred for active wearers and long-term installs.
Method 3: Elastic band & sewing for maximum comfort and security
1. Sew the wig onto a wig cap or braid pattern using a curved needle and non-breakable thread.
2. Attach an elastic band from ear to ear inside the wig for tension-adjusted security.
3. This method is common for 360 lace and full lace wigs in salons because it redistributes weight and reduces adhesive exposure to the skin while remaining highly secure.
Cutting the lace and creating a natural hairline
Trimming lace is an art. Start by cutting in small sections, following the wig's natural curve and avoiding a straight, visible cut. Use thinning shears to create soft transitions and remove excess density near the front. For a realistic hairline, carefully pluck strands along the part and front edge to mimic natural growth patterns. Feathering with a razor can soften the edge, and laying baby hairs with gel helps conceal the transition from lace to skin.
Bleaching knots and tinting lace for realism
Bleaching knots creates the illusion of hair emerging from the scalp, but proceed cautiously—over-bleaching weakens the hair and may cause shedding. Tinting the lace with lace tint sprays or a small amount of foundation matched to your skin tone can further blend the base. Always test a small section before applying to the whole wig.
Styling, finishing and heat techniques
Whether the wig is human hair or heat-safe synthetic, use heat protectant before applying hot tools. For natural movement, apply mousse or light-hold spray and scrunch for texture instead of heavy oils that weigh the wig down. For realistic parting, use a focused concealer or scalp powder along the part line and blend with a small brush. Use a low-heat blow dryer to set adhesive areas and maintain the shape of the wig after styling.
Blending edges and baby hairs
Use a small toothbrush or soft brush and edge control to lay baby hairs. Softly taper the hairline with scissors to avoid abrupt density changes. If necessary, use a silk or satin scarf for 10-15 minutes to set edges without flattening the overall volume of the wig.
Aftercare and maintenance following a wig install
Proper aftercare extends the life of both the wig and the install. Gently cleanse the wig every 1-2 weeks depending on activity level, using sulfate-free shampoo for human hair and manufacturer-recommended products for synthetics. When removing glue residue, use approved adhesive removers and avoid aggressive pulling. Store the wig on a stand or mannequin head to preserve shape and tension. Rotate between multiple wigs to reduce stress on your scalp and prevent wear on any single cap.
Scalp health & safety tips
Give your scalp breaks if you frequently wear glued-in setups. Massage and treat the scalp with lightweight oils on rest days, avoid prolonged water exposure when using glue, and remove adhesive with correct solvents to prevent irritation. If you experience persistent redness or discomfort, consult a dermatologist.
Troubleshooting common wig install issues
- Visible lace: Tint or blend lace, adjust lighting in photographs, and pluck for a less dense hairline.
- Lift at the temples: Reinforce with tape or a dab of glue and set with heat.
- Itching or irritation: Clean adhesive residue fully and try hypoallergenic adhesive products or cap-only installs.
- Unnatural parting: Use concealer or a scalp powder and re-pluck parting line as needed.
Emergency fixes on the go
Carry a mini kit with tape tabs, a small adhesive remover pad, a travel brush and a few safety pins. For instant lift or flare-ups, a well-placed bobby pin behind the ear or a discreet elastic band can stabilize the wig until you reach a full mirror.
Advanced pro tips to elevate any wig install
1. Mold the lace to your hairline by lightly heating the lace (with careful, controlled heat) to better conform to contours.
2. Add individual hand-tied sections near the part to simulate scalp depth for ultra-realism.
3. Use a custom density approach—thin front density while preserving fullness at the crown to match natural patterns.
4. Stitch-in hairline reinforcement: a small row of stitching close to the hairline creates long-term security for frequent wearers.
Photography and social media presentation
When showcasing your install, use soft directional lighting that mimics natural sunlight; avoid direct overhead light that can expose lace contrast. Capture close-up before-and-after shots and include process images to demonstrate skill and build trust in your posts if you provide installations professionally.
Checklist before you call it finished
- Is the hairline natural and blended?
- Does the wig sit flat with no bubbles under the cap?
- Is adhesive set and edges sealed with low heat?
- Have you safely trimmed and styled excess lace?
- Is the part defined and shaded to mimic scalp?

When all boxes are checked, your wig install should look effortless and feel secure.
Choosing the right method for your lifestyle
Short-term users and beginners often prefer tape installs because they are less intimidating and easily removable. Athletes or those with active lifestyles may require a glued install or sewn-in technique for the best hold. If comfort and scalp health are top priorities, sew-ins with elastic support are an excellent middle ground. Match your installation method to your daily routine, climate and skin sensitivity.
Cost vs. longevity considerations
Glue and sew-in installs typically cost more upfront or require salon skill, but they can extend the period between full re-installs. Tape is cheaper and faster but may need more frequent attention. Budget accordingly for adhesives, maintenance supplies and occasional professional resets.
Final notes on achieving natural results
A natural-looking wig install is a combination of the right wig, careful prep, precise application and smart finishing touches. Take your time, practice the techniques that suit your hair type and lifestyle, and always prioritize scalp health. The difference between a basic placement and a pro-level install is often about subtleties—softened hairlines, realistic parting and appropriate density adjustments.
Resources and next steps
Practice on mannequin heads, watch step-by-step tutorials from trusted stylists and experiment with different adhesives, wig caps and styling tools. Keep notes on what works for your face shape and lifestyle. Over time, installations will become faster and results more consistent.
Pro-level finishing checklist
- Check tension of elastic bands and sew-in stitches for comfort.
- Confirm that baby hairs are symmetrical and soft—avoid cartoonish outlines.
- Test movement: shake your head, walk, and style to ensure no visible shifting.
- Record the adhesive brand and removal method that worked best to reproduce future installs.
Maintenance schedule after a strong wig install
Weekly: Check edges and reapply small tape pieces as needed.
Biweekly: Clean the wig gently and condition human-hair wigs.
Monthly: Assess the integrity of the lace and re-bleach or re-tint knots only if necessary.
Seasonally: Rotate wigs, deep-clean caps and plan professional touch-ups for long-term wig wearers.
Summary
From beginners grooming their first cap to pros refining lace techniques, mastering a convincing wig install takes planning, the right tools and consistent practice. Use this guide as a reference, adapt the steps to your needs and keep refining the small details that make a natural install stand out in photographs and everyday life.
FAQ
How long does a typical glued wig install last?
With proper prep and high-quality adhesive, a glued install can last 1–4 weeks depending on activity level and adhesive type.
Can I sleep in a glued or taped wig install?
Sleeping in a glued wig occasionally is possible but not recommended night after night. Use a silk pillowcase, wrap gently and allow your scalp rest days between glued installs.
What's the best way to conceal laceline shine after install?
Use dry shampoo or a light dusting of translucent powder; alternatively, a matte setting spray applied lightly can reduce shine without disrupting the bond.
If you're ready to practice, follow the checklist, try different installation methods and refine your finishing touches—over time your wig install results will consistently look and feel professional.
Related products
Blog
- what lace wig complete guide to types, installation, and care for a flawless finish
- does karol g wear wigs — revealing the hairstyle tricks and backstage facts fans want to know
- Explained what happened to paula young wigs and where shoppers can buy quality alternatives
- When Was Wigs Invented A Fascinating Timeline from Ancient Egypt to Modern Style
- Synthetic Wig Styling and Care Guide 12 Proven Tips for a Natural Look
- does lori from shark tank wear a wig - a closer look with photos, expert opinions and hairstyle facts
- can you sleep with a wig on - complete guide to overnight wear, safety tips and wig care
- are wigs expensive? Ultimate price guide, affordable alternatives and care tips