how to curl a wig with a flat iron - easy step by step guide with heat settings, pro tips and long lasting waves
Mastering the art of styling: how to curl a wig with a flat iron
If you've ever wondered how to curl a wig with a flat iron so the results look professional, long-lasting and damage-free, this comprehensive, step-by-step resource breaks everything down into simple, practical actions. Whether you're working with heat-friendly synthetic fiber or a human hair wig, the same methodical preparation, the right temperature, and a reliable technique will give you consistent waves, spirals or beachy curls without overworking the hair.
Why choose a flat iron over other tools?
Flat irons are versatile: they can create tight curls, loose waves, or smooth bends depending on the method. They heat quickly, provide control over pressure and rotation, and—when paired with the correct heat settings—deliver uniform results across wig strands. For those asking how to curl a wig with a flat iron, the key is a controlled, repeatable process so every section receives equal heat and shaping.
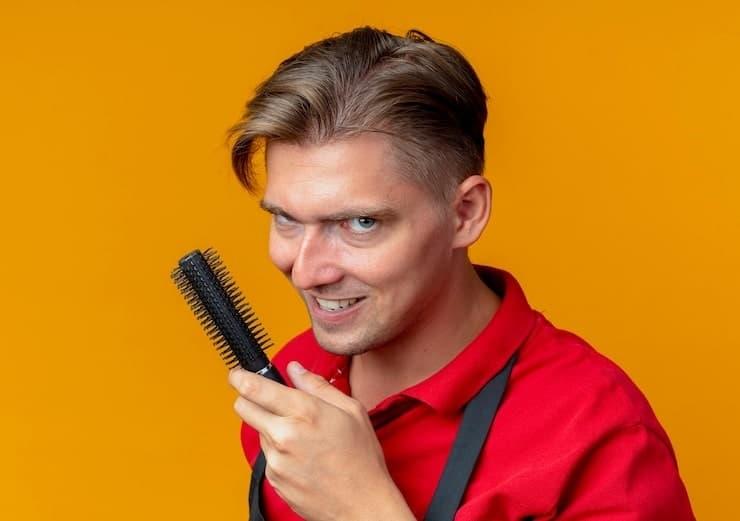
Tools you’ll need
- Flat iron: A slim, plate-style straightener (0.75–1 inch) is ideal for most wig types.
- Heat protectant spray: Must be suitable for synthetic wigs if applicable; many heat-friendly synthetics still need protection.
- Sectioning clips: To divide hair into manageable subsections.
- Wide-tooth comb or paddle brush: For detangling before styling.
- Wig stand or mannequin head: Secures the wig for consistent curling.
- Light hairspray or setting spray: Helps lock in pattern without stiffness.
- Silk or satin scarf: For sealing curls if you want to set them overnight.
Understanding fibers and heat limits
Before you attempt to curl, identify whether the wig is synthetic, heat-friendly synthetic, or human hair. Heat tolerance varies: many traditional synthetics melt or frizz at low temperatures, while human hair handles higher heat but still benefits from protective care. Below is a concise guideline:
- Non-heat synthetic: No flat iron. Use foam rollers, steam or cold styling only.
- Heat-friendly synthetic: Typically safe at 250–300°F (about 120–150°C). Always check manufacturer instructions.
- Human hair: Can usually withstand 300–400°F (150–200°C). Use lower end for fine hair and higher end for resistant textures.
Step-by-step: how to curl a wig with a flat iron (prep to finish)
This stepwise approach is designed to create uniform shape and volume, from small coils to loose S-waves. Follow each step and adapt heat settings to the fiber type.
Step 1 — Set up your workspace
Secure your wig on a mannequin head or wig stand at eye-level. Good lighting and a clean, flat surface help you see every section. Have clips, a comb, and your heat-protectant within reach so you don’t pause mid-process. A steady setup makes it easier to answer “how to curl a wig with a flat iron” with consistent success every time.
Step 2 — Detangle and protect
Gently comb from ends to roots. Apply a light mist of heat protectant overall; spray more on the lengths than the cap to avoid a greasy base. For synthetic heat-friendly wigs, ensure the protectant states compatibility with synthetic fibers.
Step 3 — Choose the right temperature
Set your flat iron according to the fiber: for heat-friendly synthetic start at a lower setting (around 250–270°F) and test a small hidden strand; for human hair begin around 300°F for fine hair and up to 380–400°F for coarser density. Remember how to curl a wig with a flat iron relies heavily on correct heat selection — too low and the curl won’t form; too high and you risk damage or melting.
Step 4 — Section hair systematically
Make horizontal sections from the nape to the crown. Work in layers approximately 1–1.5 inches thick for medium-sized curls. Smaller sections yield tighter curls, larger sections yield looser waves. Keep hair taut but not overstretched when placing the flat iron.
Step 5 — Curling techniques
Technique A — Clamp-and-twist method: Clamp the flat iron at about 1–2 inches from the ends, twist the iron 180–360 degrees away from the face, and glide smoothly to the roots. This creates defined curls with a classic spiral shape. Technique B — Wrap-and-slide method (great for uniform waves): Open the plates, place hair on the plates, wrap the hair around the iron once, then close and slide up. Technique C — Bend-and-release (ideal for effortless waves): Clamp a small section, rotate 90 degrees and slide quickly to create a bend rather than a full coil. Each method answers a different aesthetic question: how to curl a wig with a flat iron to get tight spirals, beach waves, or soft bends.
Pro tip: For natural movement, alternate curl directions on adjacent sections—curl one section away from the face and the next toward the face.
Step 6 — Cool and set
After curling each section, pin the curl in place on the wig or let it cool free depending on the look. Cooling down sets the curl pattern. For long-lasting waves, pin the curls and allow them to cool fully before releasing. Use a light setting spray if you want extra hold.
Step 7 — Finish and refine
Once all sections are done, gently run fingers or a wide-tooth comb through to soften the curls. Apply minimal serum to add shine and control frizz. If you prefer loft and volume, use a root-lift spray at the base and fluff with fingers. For an ultra-polished finish, lightly smooth the top layer with the flat iron set to a low temperature.
Heat-setting chart at a glance
| Wig Type | Suggested Temp (°F) | Notes |
|---|---|---|
| Non-heat Synthetic | Do not use | Use steam/rollers |
| Heat-friendly Synthetic | 250–300 | Test a hidden strand |
| Human Hair (Fine) | 300–340 | Use lower setting |
| Human Hair (Medium/Thick) | 340–380+ | Use protective product |
Advanced pro tips for longevity and style
- Pre-stretch curly wigs: If you work with a wig that already has texture, flat iron in small sections to reform pattern carefully.
- Use micro-fiber towels: When washing a wig, blot instead of rubbing to reduce frizz before styling.
- Silicone-based serums: Small amounts smooth cuticles and preserve shine after heat styling.
- Pin-and-cool method: For vintage-style curls, roll each flat-iron curl and pin until fully cool.
- Alternate plate pressure: Too hard a clamp flattens hair; use consistent but gentle pressure for even heat distribution.

Common mistakes to avoid
Rushing through sections, using excessive heat, and neglecting heat protection are common errors. Another is styling a tangled wig—never apply high heat to snarled hair. Also, avoid saturating wigs with heavy oils before heat styling; lightweight sprays work best.
How to maintain curls day-to-day
To keep curls longer: sleep with a satin cap, refresh with a mist of water and a curl-defining spray, and avoid overbrushing. For synthetic wigs, minimize repeated heat sessions; alternate non-heat styling days to preserve fibers.
Styling variations and looks
By changing section size, angle and direction, you can achieve a wide range of effects. Use small barrel-size sections for tight, bouncy curls, medium sections for modern waves, or large sections for voluminous, glamorous loops. If you want mermaid waves, use the bend-and-release method to create a flowing S-pattern. The ability to adapt answers the frequent query of how to curl a wig with a flat iron for varied aesthetics.
Quick checklist before you start
- Confirm fiber heat tolerance.
- Detangle gently and apply heat protectant.
- Set flat iron to the appropriate temperature.
- Work in neat, consistent sections.
- Cool curls and use a finishing product.
Troubleshooting
If curls are limp, try smaller sections or slightly higher heat (within safe limits). If edges or cap material warp, stop immediately—cap cannot tolerate heat and may need protective padding or a styling alternative. For frizz after curling, mist with a smoothing spray then lightly pass the iron (low heat) to tame the surface.
Eco and safety considerations
Always work in a ventilated area, unplug the flat iron after use, and store it away from water. Reusable heat-protectant formulations are available that minimize environmental impact compared to single-use products.
Checklist for salon-quality results
- Reliable flat iron with adjustable temperature controls.
- Consistent sectioning technique.
- Effective heat protectant suitable for the wig fiber.
- Time to cool and set each curl properly.
- Finishing products that match the hair type (synthetic vs human).
When done correctly, the answer to how to curl a wig with a flat iron is not a quick trick but a repeatable routine that professionals use: preparation, measured heat, controlled technique, and quality finishing. These repeatable steps lead to consistent, camera-ready results.
Maintenance tips to keep curls fresh
Between styling sessions, store curled wigs on a stand, loosely cover with a satin scarf, and avoid heavy product buildup. Lightly steam and reshape rather than reapply heat frequently. For long-term bounce, consider setting sprays with flexible hold instead of heavy varnish.
Product recommendations (general)
- Lightweight heat protectant spray labeled for synthetic/human use
- Low-hold flexible hairspray
- Silicone-free leave-in conditioners for wig caps
- Fine-tooth comb for precise parting, wide-tooth for detangling
Final thoughts
Learning how to curl a wig with a flat iron is a valuable skill that expands your styling options. With the right tools, thoughtful heat management, and practiced technique, you can recreate salon-quality curls at home. Be patient, test temperatures on inconspicuous sections, and always prioritize fiber health when choosing settings.
FAQ
Below are common questions that pop up when people learn to curl wigs with a flat iron.
- Q: Can I use any flat iron on a wig?
- A: Use an iron with adjustable temperatures and narrow plates for best control. Ensure plate material is smooth (ceramic/tourmaline) to minimize snagging.
- Q: How long do flat-iron curls last on a wig?
- A: Longevity depends on fiber type, products used and how you set the curls. On human hair, properly set curls can last several days; on heat-friendly synthetics, results may vary but last with careful aftercare.
- Q: Is there a safer alternative for non-heat synthetic wigs?
- A: Yes—use foam or Velcro rollers, steaming tools designed for synthetics, or overnight pin-curl methods to create curls without heat.
By following these steps, experimenting responsibly, and respecting the wig’s fiber type, you’ll master the technique and consistently answer how to curl a wig with a flat iron with confidence and excellent results.
Related products
Blog
- How to Put a Lace Front Wig step-by-step tutorial for a natural look and secure fit
- how to use a wig cap with long hair step-by-step tips for a secure natural-looking fit
- can you dye a synthetic wig with regular hair dye Discover the truth risks alternatives and step by step tips for best results
- how to make a medusa wig step by step easy DIY cosplay tutorial with realistic snake details and budget materials
- how to become a wig specialist step by step guide to mastering wig design fittings and launching your own wig business
- do kapil sharma wear wig revealed by celebrity hairstylist with photo evidence
- How to Flatten Hair for Wig with Heat-Free Methods and Salon-Level Styling Tips
- does charlie hurt wear a wig Examining the Evidence, Photos and Fan Theories