Step-by-step tips on how to lay a lace front wig for a flawless natural hairline and long-lasting hold

how to lay a lace front wig: A Complete, Step-by-Step Guide for a Natural Hairline and Long-Lasting Hold
If you're searching for reliable, detailed steps on how to lay a lace front wig, this comprehensive guide is designed to walk you through every phase from prep to removal. Whether you're a beginner or refining your technique, you'll find practical tips, product recommendations, troubleshooting advice and styling strategies to achieve a flawless, natural-looking hairline and a secure, long-lasting fit.
Why mastering how to lay a lace front wig matters
Learning how to lay a lace front wig properly improves realism, prevents lifting, extends the life of the lace, protects your natural hair and boosts overall confidence. A well-laid lace front mimics a natural hairline, allowing you to part the hair freely and style it close to the forehead without revealing the wig cap. This guide emphasizes safe preparation and adhesive choices to preserve scalp health while maximizing hold.
Essential materials and tools
- Wig cap (breathable, slightly darker or similar to your scalp tone)
- Lace-front wig pre-plucked or customized for your hairline
- Scalp cleanser (rubbing alcohol or specialized cleanser)
- Adhesives: wig glue/adhesive, lace tape, or wig grip depending on your preference
- Edge control and small brush or toothbrush
- Scissors or razor for trimming excess lace
- Blow dryer (cool/warm setting) and handheld mirror
- Makeup (foundation, concealer, powder close to your skin tone)
- Oil-free moisturizer or barrier if needed
- Hair clips to hold hair away while applying
Prep: Skin, natural hair and wig
Start by cleansing the hairline and forehead area thoroughly with a gentle cleanser or isopropyl alcohol to remove oils, makeup and residue. This step is crucial for getting a long-lasting bond if you plan to use adhesive or lace tape. If you have natural hair, braid it into flat cornrows or slick it back into a low bun so the base of the wig sits flat. Wear a well-fitted wig cap that matches your scalp tone; this creates a smooth foundation and protects your hair beneath the wig.
Key skin prep tips
Avoid heavy moisturizers or oily products before glue application. If you have sensitive skin, perform a patch test with your chosen adhesive 24-48 hours in advance. Use a barrier product only if directed by a dermatologist or wig professional to reduce irritation risks.
Customize your lace for a realistic line
Many ready-made lace-front wigs need minimal customization to look natural. Carefully trim the excess lace about 1-2 mm from the hairline using sharp scissors; cut in small sections and follow the wig hairline in a jagged motion rather than a straight line to emulate natural hair growth. If the wig is very dense at the front, consider plucking a few hairs for gradual density—do this sparingly and step back to evaluate often.
Adhesive choices: tape, glue or wig grip
Knowing when to use tape, glue or a wig grip depends on lifestyle and skin type. Tape offers strong, clean hold and is easy to remove with adhesive remover. Glue (liquid adhesive) provides a seamless look and is ideal for active days or water exposure, but requires careful skin preparation and removal. Wig grips (velvet headbands) are less invasive and great for short-term wear or sensitive scalps but may not deliver the same ultra-thin hairline look.
Step-by-step application method
- Position the wig: Place the wig on your head and align the lace with your natural hairline. Hold the wig at the nape and pull forward while maintaining balance with your free hand. Mark the desired position with a washable eyeliner or leave small dots to remember placement.
- Trim the lace: Take the wig off and trim the lace carefully if you haven't already. Use small, precise snips and cut in a curve or jagged pattern to mimic natural hair growth.
- Prep the adhesive area: Clean the skin along the hairline again, and let it dry. If using glue, apply a thin even layer of adhesive to the skin in small sections; allow it to become tacky (usually 30-60 seconds depending on the product).
- Lay the lace: Starting from the center of the forehead, gently lay the lace down onto the tacky adhesive, pressing lightly to secure. Work outward to the temples and then to the nape to prevent bubbles and ensure even contact. If you use tape, apply strips along the hairline before placing the wig and press the lace onto each strip.
- Seal and blend: Once the lace is down, use a cool blow-dryer to set the adhesive further. Apply a small amount of concealer or foundation that matches your skin tone along the lace part to blend the hairline and reduce visibility. Lightly powder to set makeup and reduce shine.
- Create baby hairs (optional): Pull a few hairs from the front and trim to desired length. Use edge control and a toothbrush to style them for a soft, natural effect. Avoid making baby hairs overly perfect—naturalness is key.
- Final adjustments: Check symmetry and make small tweaks with scissors or a razor if necessary. Use a flat iron or curling iron to style the wig, being mindful of heat-safe fibers.
Advanced techniques for a couture hairline
For a couture finish when learning how to lay a lace front wig, try the following pro-level tips: tint the lace using special lace tint spray or alcohol-based foundation to match your skin tone; melt the lace with a low-temp glue gun technique or a specialized melt product for undetectable blending; and strategically pluck hairs to create a soft-density transition at the temples. Use a fine-tooth comb to create a natural-looking part and apply a small amount of concealer beneath the part for depth.
Daily maintenance and longevity
- Sleep with a silk or satin bonnet to reduce friction.
- Avoid excessive sweating when adhesives are freshly applied—wait 24 hours before heavy workouts if possible.
- Use sulfate-free shampoos and low-manipulation routines to keep the wig fibers healthy.
- Clean adhesive residue with proper remover to avoid scalp irritation and prolong lace life.
Troubleshooting common issues
Edges lifting
If the lace lifts at the temples or nape, gently lift the area and reapply a thin layer of adhesive, then press down and dry with a cool blow dryer. For minor lifts, double-sided tape patches can provide quick fixes.
Visible lace color mismatch
Use a skin-tone lace tint or apply a thin layer of foundation directly to the lace before setting. Translucent powder over the foundation helps blend in bright lights.
Itchy or irritated scalp
Remove adhesive immediately, cleanse gently and consult a dermatologist if irritation persists. Consider switching to non-latex or medical-grade adhesives designed for sensitive skin.
Removal: Do it safely
Never forcibly rip a lace front wig off. Use an adhesive remover specifically designed for wig glue or tape. Saturate the hairline thoroughly, wait the recommended time and gently peel back the wig starting from one side while holding the skin flat. Cleanse residual adhesive and treat the scalp with a soothing aloe or recommended aftercare product.
Storage and care between wears
Store your lace front on a mannequin head for optimal shape retention, or use a breathable storage bag if space is limited. Cleanse and condition per fiber type (human hair vs. synthetic) and detangle from ends to roots before storage. Replace tapes and reline adhesive as needed to maintain safety and hold.
Product recommendations and selection tips
When selecting products for how to lay a lace front wig, choose adhesives with good reviews for longevity and skin compatibility. For all-day hold, look for water-resistant solutions rated for extended wear. For frequent wearers, invest in gentle removers and barrier products to protect skin integrity. Also select lace color based on your complexion—transparent lace is versatile, but a tinted lace can save time in matching skin tone.
Styling without damaging the lace
Be cautious when using heavy gels or oils right on the lace edge as these can weaken adhesive bonds. Use lightweight styling products and apply them sparingly. For high-heat styling, ensure the wig is heat-safe and always use a heat protectant. Trim and shape the wig on a mannequin or your head carefully—avoid cutting into the lace itself beyond the trimmed perimeter.
Common misconceptions
- Myth: More glue = better hold. Fact: Excess glue can flake, cause buildup and irritate skin.
- Myth: You must remove wigs daily. Fact: Many adhesives are designed for multi-day wear—follow product directions and skin comfort.
- Myth: A perfect hairline is only for salons. Fact: With practice and the right tools, you can create salon-quality results at home.
Checklist: Quick reference for application
Before you begin, confirm: clean, dry skin; secured natural hair; cap fitted; lace trimmed; adhesive tested; makeup and tools ready. This simple checklist reduces errors and speeds up the process for beginners and pros alike.
Practice makes progress
Like most beauty techniques, mastering how to lay a lace front wig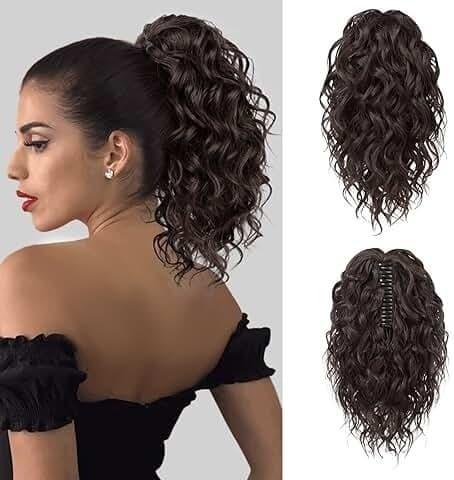 improves with repetition. Experiment with different adhesives, lace tints and plucking densities until you find a routine that fits your lifestyle and skin type. Document what works—keeping notes helps when you switch wig styles or brands.
Safety tips
Always perform patch tests for new adhesives, avoid leaving strong adhesives on the skin for longer than recommended and follow removal instructions precisely. If you experience persistent redness, swelling or pain, stop use immediately and consult a medical professional.
Eco-conscious and budget-aware options
If you're budget conscious, consider reusable double-sided wig tape or a high-quality wig cap combined with careful sizing to extend wear cycles and reduce adhesive use. For eco-minded users, choose biodegradable packaging and avoid overusing single-use remover wipes—opt for reusable applicators and cloths for cleaning.
Expert summary
To recap, the essentials of how to lay a lace front wig include careful skin and hair prep, precise lace trimming, appropriate adhesive selection, meticulous application from center outward, blending with makeup, and sensible maintenance. Following these structured steps will give you a natural-looking hairline with secure, long-lasting hold every time.
Further learning and resources
Seek video tutorials from trusted stylists for visual guidance on lace trimming and adhesive application. Local wig boutiques often offer hands-on workshops, which can accelerate your learning curve significantly. Join online communities to swap tips, product experiences and troubleshooting tricks.
Bonus styling ideas
Try a soft baby-hair design, a deep side part, or braided crown styles to make the hairline feel bespoke. Use a little shimmer-free powder to control shine for photo-ready finishes. For longevity, rotate through multiple wigs to reduce daily wear and tear on any single unit.

When to visit a professional
Consult a wig technician if you need major hairline restructuring, color correction of the lace, or if you plan to wear heavy adhesives regularly. Professionals can also ventilate and customize lace on demand for the most natural results.
Thank you for reading this thorough guide on achieving a flawless lace front finish. With attention to detail and consistent practice you'll master how to lay a lace front wig and enjoy a confident, natural look every time.
Q: How long should I wait after applying glue before exercising?
A: Wait at least 24 hours for the adhesive to fully cure. For heavy sweating, consider stronger adhesives or a professional application designed for athletic use.
Q: Can I swim with a lace front once it's glued down?
A: Some waterproof adhesives are marketed for light water exposure, but frequent swimming can weaken bonds. Use tape patches or reapply glue after water activities and choose sport-specific adhesives when possible.
Q: How often should I replace my tape or adhesive?
A: Replace double-sided tape every wear to maintain hygiene and hold. Liquid adhesives can last several days to weeks depending on type—follow manufacturer guidance and monitor skin health.
Related products
Blog
- Ultimate Guide to Red Human Hair Wigs Flattering Styles Care Tips and Buying Advice
- does diane miller on gh wear a wig Explained With Photo Evidence and On Set Hairstyle Secrets
- why did they wear wigs in the 18th century A surprising guide to powdered wigs perukes fashion status health and politics
- does stalekracker wear a wig Unpacking the Rumors, Photos and Fan Reactions
- does candace owens wear a wig answered with photos expert commentary and hairstyling clues
- Where to Buy Wigs for Cancer Patients Expert Guide to the Best Affordable Online and Local Options
- can i use heat on a synthetic wig Practical expert guide to safe heat styling, ideal temperatures and damage prevention tips
- heidi.montag wig styling secrets and wig buying tips to recreate her iconic heidi.montag looks