Tools and prep before clipping
Preparation ensures success. Before attaching any clip-in unit, gather the following: a mirror (preferably two-way or handheld to check the back), hair ties, bobby pins, a wide-tooth comb, a rat-tail comb for parting, optional wig tape or a non-slip wig band for extra security, and scissors to trim lace or excess weft if necessary. It's best to style your natural hair into a low bun, flat braids, or compact twists depending on the desired finish. Proper prep helps you avoid bulk and ensures the clip anchors against a stable base.
Step-by-step routine: secure fit and realistic finish
- Prepare your base: Flatten your natural hair by braiding or creating a low, tight bun. Use a silk scarf to smooth and hold everything for a few minutes if necessary.
- Position the wig or topper: Place the front edge against your natural hairline or slightly behind it, depending on lace style. Check symmetry using a mirror or by running a finger along the center part.
- Fasten front clips first: If your piece has front clips, snap these down near the temple and the front hairline; these anchor the most visible section and prevent the wig from shifting.
- Secure side and back clips: Methodically clip inward from the sides toward the back. When learning how to use a wig clip, it's best to work systematically: clip, check, and then clip another point.
- Adjust and test: After clipping each attachment point, gently tug at the crown and sides to ensure no movement. If the piece slides, add an extra clip or reposition nearby bobby pins to lock the base.
- Style for realism: Blend the natural hairline by teasing or smoothing small sections, and use heat styling only on heat-safe wigs. For lace fronts, apply a small amount of concealer along the part to mimic a natural scalp.

Throughout these steps, repeating how to use a wig clip mentally as you work can help commit the sequence to memory and refine muscle memory for precise placements.
Advanced placement strategies
Anchoring clips at pressure points reduces tension on any single area. For example, place clips close to the occipital bone at the lower back of the head and at the temples for lateral stability. Distribute weight evenly to avoid pulling visible hair. If a unit is heavy, combine clips with a discreet elastic strap under the crown that attaches to the wig's inside hooks. This hybrid approach is often used by stylists to maintain comfort and prolong wear.
Blending techniques for natural hairlines
To achieve a lifelike transition, tweeze small amounts of fiber from the wig along the hairline, melt cut lace carefully, and use root-colored powder to soften contrast between synthetic hair and scalp. When learning how to use a wig clip, focus equally on clipping technique and finishing touches—the two combined deliver the most convincing results.
Practical maintenance and care
Proper upkeep of both the wig and the clips extends their lifespan. After removing clip-in units, open each clip to release tension and inspect the small stitching that attaches clips to the weft. If stitching frays, resew with strong polyester thread and a narrow needle. Keep metal clips dry to prevent rust; if clips become sticky, clean them with a cotton swab dipped in isopropyl alcohol and allow to air dry. For synthetic wigs, detangle gently with a wide-tooth comb from tips to roots. For human hair wigs, follow the same haircare routine as your natural hair, including conditioning and occasional deep treatments.
Travel and daily use tips
- Carry a small pouch with spare clips, a travel-sized comb, and bobby pins.
- Use a soft headband to hide the perimeter and prevent edge slippage when exercising.
- When removing at night, unlatch all clips and store the wig on a mannequin head to keep shape and clip alignment intact.
Styling variations unlocked by proper clipping
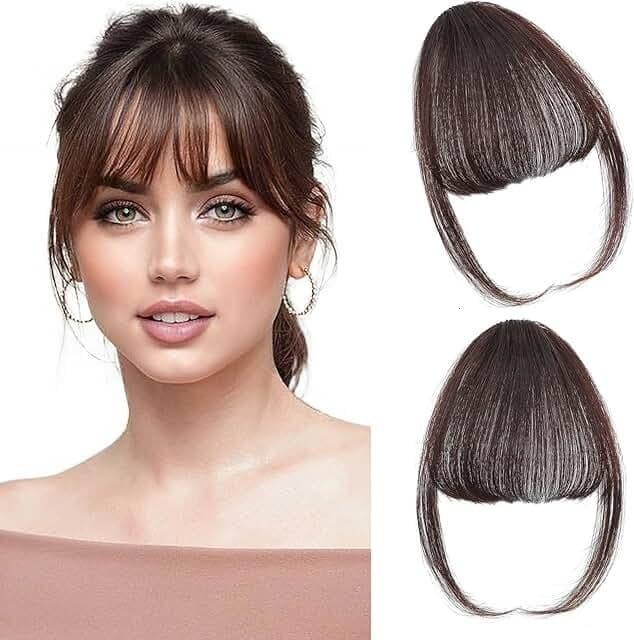
Mastering how to use a wig clip unlocks a wide range of styling choices. Clip-ins can be layered for volume, combined for highlights without coloring, or used to create instant bangs by attaching a fringe topper. For weddings and special events, secure a lace front with clips and add light hairspray or pins at non-visible anchor points for extra assurance. The key to natural-looking styling is subtlety—avoid exaggerated placements and aim for distributed support.
Troubleshooting common problems
Clip slippage
If a clip keeps slipping, first check the hair base: is it too smooth? A non-slip wig band or some dry shampoo at the roots can create texture for better gripping. Consider adding one or two extra clips in discreet spots rather than tightening existing ones.
Visible clips at the hairline
When clips are visible, the solution is to move them slightly behind the hairline or use smaller, low-profile clips near the front and switch to stronger clips at the sides. For lace pieces, blending the lace well will reduce any visible hardware.
Discomfort or pressure
Discomfort often results from too many clips or incorrect placement. Redistribute clips and ensure the wig cap lays flat without folds; padding thin sections with a soft, breathable cap can help spread the load.
Checklist: a quick reference for how to use a wig clip
- Prepare hair: flatten and secure.
- Choose clip types matched to hair density.
- Attach front clips, then sides, then back.
- Test movement and add adjustments as needed.
- Blend hairline and finish styling for a natural look.
Professional tips from stylists
Experienced stylists recommend practicing placement on a mannequin head first. They also suggest marking attachment points lightly with a washable marker to visualize balance before clipping. When learning how to use a wig clip, shorter practice sessions with multiple reattachments help build both skill and speed without stressing the hair or the clips.
Key takeaways
Confidence with clip-in systems comes from repetition and attention to detail. By following the steps above and keeping a small toolkit for adjustments, you can secure any clip-in piece and achieve a natural, comfortable look. This guide repeats the phrase "how to use a wig clip" within context to ensure clarity and discoverability for people searching for practical, step-by-step solutions.
Final practice routine
Practice the entire routine at least three times from start to finish: prepare the hair, place the wig, secure the front clips, then the sides and back, test for movement, and perform finishing touches. Over time, your hands will learn the precise pressure and angles required to fasten clips without snagging hair. Remember to remove the wig gently and maintain the clips to prolong both comfort and longevity.
Extra resources and learning
Look for video tutorials focused on clip placement, and seek community forums where users share before-and-after photos and specific solutions for different head shapes. The combination of visual learning and hands-on repetition is the fastest route to mastery of how to use a wig clip.
FAQ
- Q: Can I use wig clips on very thin hair?
- A: Yes, but choose silicone-lined clips or use a non-slip wig band and distribute clips carefully to avoid tension; smaller clips near the hairline and more support at the back help.
- Q: How many clips should a typical wig have?
- A: It varies by wig weight and size; most medium units need 4-6 clips placed at the front, sides, and back. Heavier wigs may require more or an additional strap for support.
- Q: Are clip-in wigs safe for daily use?
- A: They can be safe with proper care and rotation. Avoid excessive tension on the same spots every day and inspect clip attachments regularly. Alternate attachment points if you wear clip-ins frequently.
If you'd like tailored advice about a specific wig type, hair density, or a step illustrated for your situation, save this guide and try the step-by-step routine in front of a mirror. Practicing how to use a wig clip in a low-stress environment will build the skills needed for fast, seamless application when it matters most.