how to put hair under wig cap - step-by-step guide with pro tips for a smooth secure fit
How to put hair under wig cap: essential overview
If you've searched for how to put hair under wig cap and landed here, you're in the right place. This comprehensive resource walks through practical preparation steps, multiple methods for different hair lengths and textures, pro tips for comfort and security, and troubleshooting advice so your wig looks natural and stays put. The focus is on safe, repeatable techniques that work whether you're wearing lace fronts, full wigs, or protective caps. Read on for a detailed, SEO-friendly walkthrough that covers everything from prepping hair to final styling.
Why properly tucking hair under a wig cap matters
Securing your hair under a wig cap is not just cosmetic — it affects fit, comfort, and longevity of both the wig and your natural hair. A smooth base prevents lumps, reduces friction, minimizes slippage, and gives a natural hairline. The phrase how to put hair under wig cap is central to this guide and appears in step labels and troubleshooting sections so you can quickly find the right method for your needs.
Tools and supplies you'll likely need
- Wig cap(s) — nylon, mesh, silicone, or cotton caps; having two sizes helps.
- Elastic or wig grips for extra security.
- Bobby pins, hairpins, or small clips for pinning braids or tucked hair.
- Wide-tooth comb and rat-tail comb for neat parting and smoothing.
- Hair ties and small clear elastics.
- Optional adhesive or tape when using lace-front wigs for an invisible finish.
- Edge control or gel to smooth flyaways.
- Silk or satin scarf for setting the cap and hair overnight.
Basic step-by-step method for medium to long hair
- Detangle and moisturize: Start with clean, detangled hair. Apply a lightweight leave-in or oil to reduce flyaways and breakage.
- Create flat sections: Part the hair into horizontal sections from ear to ear and pin each section flat to the head. Smaller sections create a smoother base.
- Braid or twist: For most people with medium to long hair, three to six flat or cornrow braids work well. Braid toward the back and pin ends flat.
- Tuck and wrap: If you prefer not to braid, twist each section and coil it flat against the scalp, then secure with bobby pins or small elastics.
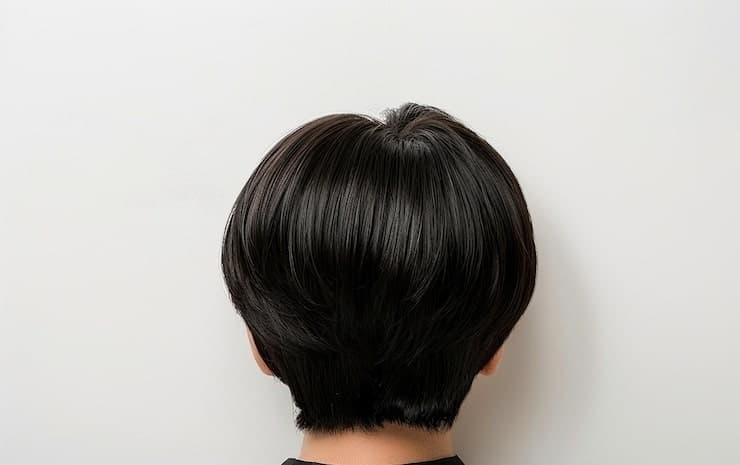
- Apply the wig cap: Hold the wig cap stretched and place it forward on the hairline, then pull it to the nape. Ensure all braids or coils are under the cap and that seams or ridges are smoothed out.
- Flatten edges: Use a comb or your fingers to smooth edges and make sure hair does not peek out near the neck or ears.
- Secure: Add a wig grip or elastic band under the cap for extra hold, or use short bobby pins through the cap into the braids (not through skin).
Technique for short hair and pixie cuts
Short hair requires slightly different tactics but the same goals — a flat, uniform base and no loose hairs. Tactics include:
- Apply a thin layer of gel and flatten hair toward the back of the head with a comb.
- Use a nylon or stocking cap that conforms closely to the head; double-cap if necessary for added smoothness.
- Consider a wig grip to prevent slippage.

Approach for thick, curly, or textured hair
Textures like coils or curls need extra care to avoid damage. Recommended steps:
- Stretch or blow-dry gently on low heat if tolerated, or use banding to elongate curls before braiding.
- Flat twists and cornrows are excellent for preventing bulk; secure ends and tape over braids if needed.
- Use a satin or silk cap under the wig cap to protect moisture and reduce friction.
Special tips for wigs with lace fronts or deep parts
For lace fronts, the smoothness and placement of your natural hairline are critical. Leave a small amount of hair out if you want a natural blending with baby hairs, or use edge control to create a clean line under the lace. When aiming for a realistic part, ensure the base under the wig is flat and that the cap can't be seen through the lace.
Step-by-step: cornrow method (recommended for long or thick hair)
- Section hair into 4–8 sections depending on density.
- Braid each section flat to the scalp (cornrows) and secure at the ends.
- Wrap the braid ends around the base and pin to create a flat coil, or stitch/secure them down with small elastics.
- Put on a smooth, elastic wig cap; check for lumps.
- Place the wig, align the hairline, and secure the unit.
Alternative: the wrap-and-pin method (no braids)
If braiding isn't an option, evenly twist small sections and wrap them into flat pin curls. This method preserves curl pattern and reduces tension on the scalp. Pin each coil with bobby pins and then apply the cap.
How to put hair under wig cap for thinning or fragile hair
Gentle methods are critical: avoid tight braids and heavy elastics. Use soft, cushioned wig caps and a silk/satin under-cap to minimize friction. Consider buttoning braid guides into a soft net or using very loose, flat rollers to keep hair flat without pulling. When possible, let a stylist assist with minimal-tension techniques.
Securing the cap without adhesives
Not everyone wants glue or tape. Alternatives include:
- Wig grips — comfortable, adjustable bands that sit along the hairline.
- Bobby pins inserted through cap into braids or into the micro-fibers of the wig's inner cap.
- Adjustable straps inside many wigs that tighten at the nape.
Using adhesives safely for a lace front
If you choose to use glue or tape for a lace-front wig, follow these safety steps: clean the skin, do a patch test, use skin-safe adhesive, and remove with proper solvent. Avoid stretching the skin when removing and follow manufacturer instructions. Adhesives provide the most invisible finish but require maintenance and care.
Edge styling and hairline blending
For a natural perimeter, style a few baby hairs or leave a thin band of natural hair out. Use a fine-edge brush and a light gel or edge control to create subtle, realistic edges. Alternatively, use pre-made lace baby hair or customize the wig’s lace hairline with plucking and tinting for density control.
Common mistakes to avoid
- Skipping detangling: lumps or knots create visible bumps under the wig.
- Using too-tight braids: can cause breakage and discomfort.
- Forgetting to secure ends: loose braid ends can poke through the cap.
- Applying excessive adhesive: more is not better — it makes removal difficult and can damage skin.
- Choosing the wrong cap size: a loose cap will shift, a tight cap will be uncomfortable.
Troubleshooting fit and comfort
If you feel pressure at the temples or behind the ears, check cap size and braid placement. If you notice slipping at the forehead, tighten internal straps or add a wig grip. For bulk at the crown, consider thinner braids or a smaller number of braids laid in a flatter pattern. Always re-evaluate after the first wear to refine your method.
Maintenance: washing and overnight care
To keep both your wig and natural hair healthy: wash the wig per manufacturer instructions, avoid sleeping in glued wigs unless advised, and store wigs on stands to maintain shape. Use a satin scarf to protect braids overnight and help the cap stay in place. Rotate wigs to reduce repeated stress on a single area of your scalp.
Variations for specific scenarios
Sports and high-activity situations
For exercise, use a snug wig grip and consider a breathable mesh cap. Secure the wig with bobby pins placed discreetly near the ear tabs and the nape to prevent excessive movement.
Children and sensitive scalps
Keep methods gentle: soft caps, loose braids, and minimal adhesives. Use hypoallergenic products and check for signs of irritation.
Medical hair loss
For those experiencing medical hair loss, prioritize non-invasive, low-tension techniques and consult a trichologist or specialist for tailored protective styling. Caps with medical-grade adhesives and specialist wigs are available to provide realistic results without aggravating the scalp.
Checklist: quick daily routine
Before applying: detangle, moisturize if needed, flatten sections, braid or twist, apply cap, check edges, apply wig, and secure. Use a mirror or an extra hand for the back to ensure even placement.
SEO-focused quick references
When searching tips or tutorials, include phrases like how to put hair under wig cap, "flat braid under wig", "best wig caps for thick hair", or "lace front application without glue" to find targeted instructions. This article intentionally repeats the primary keyword in headings and paragraphs to match common search intents and improve discoverability for readers seeking practical, trustable guidance.
Pro stylist tips for a flawless finish
- Pluck a few hairs from the wig hairline to soften density for a natural look.
- Match cap color to scalp tone when possible to reduce visibility under lace.
- Combine a thin band of leave-out hair with edges to blend lace fronts.
- Use a hairline powder that matches your skin on lace to create the illusion of scalp.
- Practice makes perfect — rehearse your chosen method a few times before an important event.
Environmental and seasonal considerations
Hot weather may require breathable caps and sweat-wicking layers; cold climates can tolerate thicker under-caps. If you swim frequently, consider swimming caps and secure methods designed to withstand water exposure, and always rinse and care for the wig after contact with chlorine or salt water.
When to consult a professional
If you have persistent irritation, fitting problems, or medical hair concerns, seek a professional wig stylist or healthcare provider. They can custom-fit wigs, advise on adhesives, and recommend protective strategies tailored to delicate scalps.
Summary
Learning how to put hair under wig cap is about choosing the right preparation for your hair type, using the correct cap and tools, and practicing safe, low-tension techniques. Whether you braid, twist, or wrap, the goal is a flat, comfortable, and secure base for your wig. Use the steps and tips above to refine your routine and achieve a natural, long-lasting result.
Additional resources and search tips
Look for video tutorials demonstrating braiding and tucking techniques, and read product reviews for wig caps and adhesives. Use community forums for personalized hacks, and bookmark trusted stylist blogs for advanced methods.
Tip: If you need a fast checklist to follow before events, save a compact version of the steps to your phone so you can apply the method quickly and confidently.
FAQ
Q: Can I put a wig cap on with make-up on my hairline?
A: Yes, but take care to protect makeup near the hairline. Use a barrier like a thin strip of clean cotton or apply makeup after placing the wig if possible to preserve the look and avoid staining caps.
Q: How do I avoid my wig cap showing through lace?
A: Choose a cap color close to your scalp tone and use minimal, breathable material. For lace, consider a wig cap with simulated scalp color or add a skin-toned wig liner to match under the lace.
Q: Will my hair break from wearing a wig daily?
A: Regular wig use can be safe if you use gentle, low-tension methods, moisturize your hair, and give your scalp periodic breaks. Avoid extremely tight braids and prolonged use of adhesives without proper care.
End of guide — revisit sections as needed and experiment to find the routine that suits your hair, lifestyle, and wig type best. Regular practice and small adjustments will make your process faster and your results more natural over time.
Related products
Blog
- where can i try on wigs - Local salons, boutiques and virtual try-on tips to find the perfect fit
- Long Wigs 2025 Guide Discover Trendy Styles Care Tips and Top Picks
- Where to Buy Wigs for Cancer Patients Expert Guide to the Best Affordable Online and Local Options
- Expert Answers does lori from shark tank wear a wig and What Hairstylists Reveal
- does tom cruise wear a wig Debunking the Rumors With Stylist Insights Photo Evidence and Movie Hair Tricks
- how to make a closure for a wig DIY step by step guide for a natural looking finish
- did bella wear a wig in twilight — uncovering the truth about Bella Swan's hair wigs and on-screen styling
- Hard wig hacks for a soft life, wig care tips to keep your life soft and your hard look effortless