how to pluck a lace wig step-by-step guide for a natural salon-ready hairline

Mastering a Natural-Looking Edge: Practical Intro
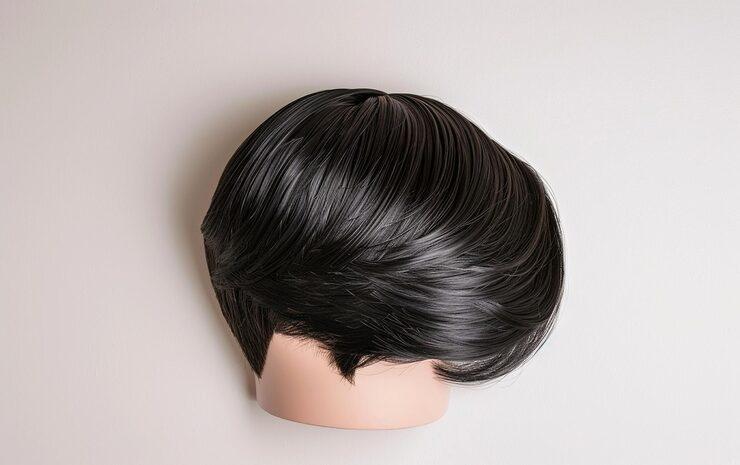
If you've ever wondered how to pluck a lace wig for a believable, salon-grade hairline, this comprehensive guide is tailored to help both beginners and experienced wig-wearers. The goal is to transform a premade lace front into a custom-looking, soft, and realistic hairline without sacrificing hair density or damaging the lace. Below you'll find clear, layered instructions, best-practice tips, and optional styling touches to ensure your wig looks like it was made for you.
Why customizing the hairline matters
Many ready-to-wear lace pieces come with a straight, dense perimeter that looks artificial after installation. Learning how to pluck a lace wig allows you to create gradual density, mimic baby hairs, and produce natural irregularities that trick the eye into believing the hair is growing out of your scalp. This step alone often changes a wig from "wearable" to "undetectable."
Who this guide is for
- Beginners who want a clear, safe process.
- DIY enthusiasts aiming for salon-level finishes at home.
- Stylists who need a reliable protocol to share with clients.
Materials and tools you'll need
Before we start the practical steps on how to pluck a lace wig, assemble the right toolkit to protect the lace and get precise results:
- High-quality tweezers (slanted tip recommended).
- Fine eyebrow razor or micro trimmer for wisps.
- Tail comb and small clips to section hair.
- Static-free mannequin head or your own head with a wig cap.
- Mirror with good lighting; a magnifying mirror optional.
- Rubbing alcohol or alcohol-free cleansing spray and cotton buds.
- A soft brush for sweeping away stray hairs.
- Light-hold styling glue or gel and a blow-dryer for setting edges (optional).

Preparation: Set your workspace and mindset
Comfort, patience, and good lighting are crucial. Plucking is a slow, controlled process — rushing increases the chance of over-thinning. Secure the wig on a mannequin head or place it on your own head over a wig cap. Make sure the lace is secured tautly with pins or clips so you can see the hairline clearly. If you are concerned about making mistakes, practice on a less-expensive unit first. Understanding the natural hairline of your face shape helps: most hairlines are asymmetrical and have thinner front sections that frame the face.
Step-by-step: How to pluck a lace wig safely and effectively
- Inspect the hairline: Use a magnifier or close mirror to observe where the hair is unnaturally dense. Identify areas that need softening and spots where baby hairs would naturally exist.
- Clean the lace: Lightly wipe the lace with alcohol on a cotton bud to remove oils. This helps you see the knots and ensures a clean workspace. Avoid soaking the lace, which can weaken it.
- Section the hair: Use clips to move hair away from the perimeter. Starting with small, manageable sections prevents accidental over-plucking.
- Pluck in small increments: Using angled tweezers, gently grab a few hairs (1–3) at a time from the root knot and pull in the direction of growth. Avoid pulling straight out perpendicular to the lace to reduce stress on knots.
- Create gradual density: Work from the temple toward the middle, removing more hairs near the temples and slightly fewer toward the center to replicate natural thinning patterns.
- Strategic thinning: Instead of uniform thinning, create little clusters of thinner density and leave occasional denser patches; nature is rarely perfectly even.
- Define baby hairs: Use the eyebrow razor or micro trimmer to craft wisps around the perimeter. Trim conservatively and refine slowly — you can always take more, but you can't add hair back.
- Check symmetry and step back often: After each small pass, step back, view from a distance, and compare sides. Symmetry is about balance, not mirror-image exactness.
- Refine knots if needed: If you accidentally remove hair and expose knots, you can soften the look by lightly bleaching knots before plucking in future customizations or by using makeup to conceal shadows.
- Set the edges:
 Once satisfied with density, style baby hairs with a light gel and a small brush. Use a blow-dryer on low to set if necessary, and trim to the preferred length.
Common mistakes and how to avoid them
- Over-plucking: The most frequent error. Solution: stop after small passes and compare frequently.
- Poor tool choice: Cheap tweezers can slip and rip knots. Invest in precise, cushioned tweezers.
- Working on loose lace: If the lace moves, you risk uneven results. Secure it tightly before beginning.
- Plucking too close to the center: This can create an unnaturally sparse look. Keep central density slightly fuller.
Techniques to customize different hairline types
Not all hairlines are the same. Below are quick strategies for common shapes:
- Round faces: Keep a gentle taper; slightly higher temples and subtle baby hair work well.
- Oval faces: Most styles suit this shape; aim for natural irregularity rather than aggressive thinning.
- Square faces: Soften strong jawlines with wispy front hair and avoid severe, straight hairlines.
Advanced tips for a salon-ready finish
After you learn how to pluck a lace wig, these finishing touches raise the realism:
- Bleach or tint knots: Lightly bleach dark knots for a scalp-like appearance or use foundation/tint suited to your skin tone to mask visible knots.
- Microlayering: Add a couple of shorter, subtle layers near the front to mimic natural growth patterns.
- Color gradation: Slight root shadowing or baby highlights can add dimension and hide density inconsistencies.
- Glue-less installation: For those who prefer temporary wear, plucking combined with a snug wig cap can still produce a believable hairline without adhesives.
Maintenance: keep it fresh
Protect the delicate plucked hairline by avoiding heavy manipulation when washing or styling. Detangle gently from the ends and avoid pulling near the hairline. Periodically restyle and re-pluck minimally to keep the illusion intact as hair shifts with wear. When storing the wig, place it on a headform to preserve the shaped hairline and prevent flattening.
Quick checklist before you finish
- Good lighting and secure lace.
- High-quality tweezers and a small trimmer.
- Patience to work in tiny increments.
- Comparison checks from multiple angles.
- Setting and styling to lock in the final look.
How to pluck a lace wig: troubleshooting common issues
If the lace looks too thin in places, blend using a few micro strands from the interior and trim them down to edge length. For visible knots, apply a skin-tone concealer or lightly bleach knots in future units. If baby hairs won't sit, try a lightweight gel and brush them into place while drying slowly. For lift or gaps near the temple, add small silicone beads or sew tiny reinforcement stitches to better anchor the lace when installing.
How long does the process take?
Expect a first-time session to take 1–3 hours depending on the level of customization and wig density. Subsequent light touch-ups typically take 15–30 minutes. The key is to focus on controlled, incremental adjustments rather than finishing quickly.
Safety and lace longevity
Over-manipulation can weaken knots and lace fibers. Avoid plucking the same exact spot repeatedly; spread adjustments evenly along the hairline. When cleaning, use gentle products and avoid high heat directly on the lace base. If you must remove knots or alter the lace chemically, understand the risks and test on a small area first.
Visual cues of a successful pluck
A natural hairline has irregular spacing, varied strand lengths, subtle baby hair, and a soft, tapered edge rather than a straight, abrupt line. If you can run a finger across the hairline and feel gentle, organic variance instead of a block of uniform hair, you've achieved the desired outcome.
Styling after plucking
After you learn how to pluck a lace wig, try styling options that accentuate the softened edge: soft waves, face-framing layers, and low ponytails with wispy baby hairs can all increase realism. Light sheen products help mimic natural oil while avoiding heavy silicones that create an artificial shine.
Remember: the most convincing transformations come from subtlety and restraint. Less is often more when customizing lace hairlines.
Professional vs. DIY: when to seek help
If you're preparing a high-value unit or need an advanced hairline design (extreme density changes, complex coloring, or hair replacement for medical reasons), consulting a specialist can save time and protect your investment. Professionals can offer tailored bleaches, knots tinting, and micro-placement that are difficult to replicate at home.
Wrap-up and final encouragement
Learning how to pluck a lace wig will elevate your wig-wearing experience and help you cultivate consistent, flattering results. With the right tools, a methodical approach, and patience, you can create a realistic, salon-ready hairline that complements your face and personal style. Keep experimenting, document what works for you, and gradually refine your technique.
FAQ
Q1: Will plucking damage the wig?
A1: When done carefully using proper tweezers and small increments, plucking should not significantly damage the wig. Avoid pulling too forcefully and secure the lace before working.
Q2: Can I pluck a lace wig that's been installed?
A2: It's best to pluck before final installation on the head for precision. If necessary post-install, remove the wig or carefully lift the lace to avoid stressing the adhesive.
Q3: How can I make plucked areas look more natural immediately after plucking?
A3: Use a small amount of concealer or foundation along the lace to match your scalp tone, and style baby hairs with light-hold gel to blend edges. A scalp powder can also reduce contrast under bright light.
Q4: Is plucking recommended for all lace types?
A4: Yes, but take extra care with thinner Swiss lace as it's more delicate. HD lace may require gentler handling and subtle styling to avoid visible manipulation.
If you want a short practice routine: reserve 30 minutes twice a week to work slowly on a small section until you gain confidence. Over time, your hands will become steadier and your eye for natural density will improve, making every wig you customize look progressively more realistic.
Related products
Blog
- did paula young wigs go out of business Latest update, why shoppers are concerned and where to find similar styles
- How to Put Lace Front Wig Easily Step by Step with Pro Tips for a Natural Secure Fit
- What Are Wigs Made Out Of and How to Choose the Best Material - Human Hair, Synthetic Fibers, Lace Fronts and Care Tips
- wig shop guide 2025 top-rated places for natural hair wigs affordable styles and care tips
- wig outlet store 2025 buying guide Discover top styles tips for natural looking wigs and the best deals
- do you wash wigs - step-by-step cleaning tips, drying methods and care mistakes to avoid
- Natural hair wigs 2025 Buying Guide — Top Tips to Choose, Care, and Style Realistic Lace and Human Hair Wigs
- do you have to wear a wig cap - 7 essential reasons, expert tips and styling hacks for a secure comfortable look