how to melt lace frontal wig safely step by step guide with pro tips for a seamless natural hairline
Mastering a Seamless Hairline: Safe Techniques to Melt Lace Frontal Edges
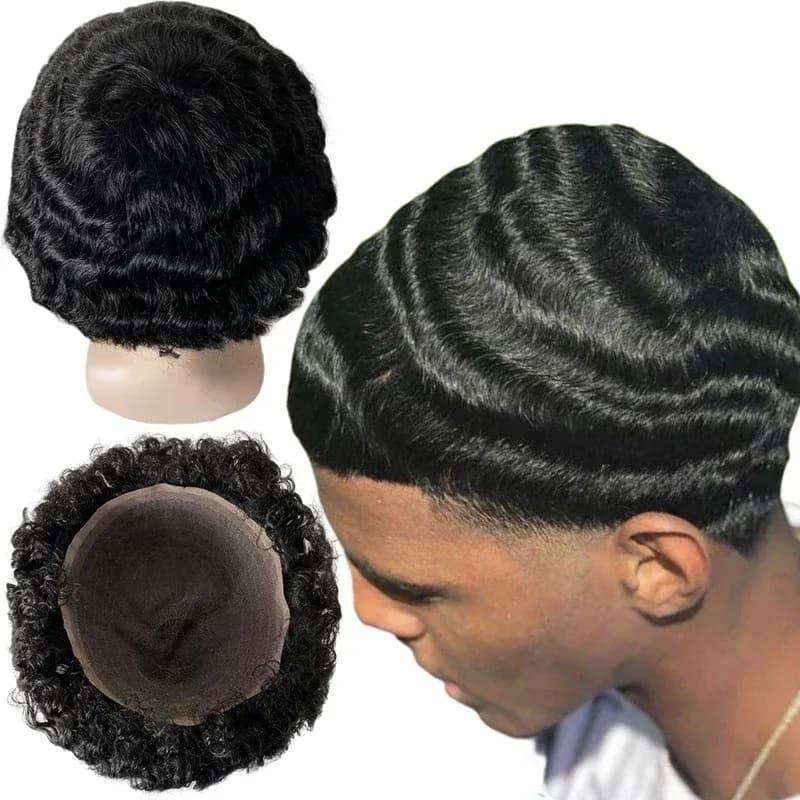
If you want a natural, undetectable hairline, understanding how to melt lace frontal wig is essential. This comprehensive, step-by-step resource covers safe practices, tool selection, and pro tips to help you melt a lace frontal without damaging the lace or your skin. The focus here is practical, SEO-optimized guidance that keeps safety and realism at the forefront while offering adaptable methods for beginners and professionals alike.
Why melting a lace matters and what “melt” really means
When people say they want to "melt" a frontal, they typically mean blending the lace into the scalp visually so the hairline appears to grow naturally from the skin. The process involves lace manipulation, adhesive selection, heat or sealing techniques, and styling tricks to create an invisible edge. Learning how to melt lace frontal wig properly minimizes lifting, reduces breakage to the lace, and produces a long-lasting, polished look.
Quick overview of safe melting methods
- Adhesive melting (glue/gel): Using a skin-safe adhesive or lace glue for a smooth bond that appears melted against the skin.
- Heat-assisted blending: Low heat tools like a blow dryer on cool/low or steam can relax lace fibres and adhesives for seamless edges.
- Plucking and custom hairline shaping: Removing excess hair along the frontal and creating baby hairs that match your natural growth pattern.
- Makeup blending and lace tinting: Using foundation, concealer, or lace tint to match the lace to your scalp tone for instant invisibility.
Tools, products, and preparation checklist
Before you start, assemble everything you need. Proper prep sets the stage for a professional finish. Common items include:
- Medical alcohol or alcohol pads to clean skin
- Edge control gel or lace glue formulated for skin
- Got2b freeze spray or professional lace adhesive/sealant
- Fine-tooth comb, spoolie, and small scissors
- Blow dryer with cool-to-low settings or a handheld steamer
- Elastic band or wig grip to secure frontal while glue dries
- Makeup that matches scalp tone: concealer, foundation, or lace tint
- Heat protectant cloth and low-temperature styling iron (if using heat on the hair only)
Safety-first reminders
Always patch-test any adhesive, solvent, or topical product on the inner arm at least 24 hours before use. Avoid high heat on lace—lace is delicate and will melt or discolor under intense temperatures. Keep solvents like isopropyl alcohol and adhesive removers away from eyes and open skin wounds. When in doubt, choose methods that use mechanical blending (plucking, tinting, baby hair) over aggressive chemical or thermal techniques.
Step-by-step guide: safe process to melt lace frontal wig
Step 1 — Prepare your scalp and frontal
Start with a clean, oil-free hairline. Use an alcohol pad to remove sebum and makeup. Secure your natural hair under a wig cap or braid pattern to create a flat base. Place the frontal and position it exactly where you want the hairline to sit—mark lightly with a skin-safe pencil if necessary.
Step 2 — Customize the lace and hairline
Remove excess lace carefully using small scissors, cutting as close to the hairline as possible without cutting hair. Pluck sparse areas gradually: fewer pulls, more passes. Creating an irregular, feathered hairline is key to natural appearance. When you pluck, step back often to check symmetry and avoid over-thinning.
Step 3 — Tint or bleach knots if needed
If the knots are visible, knot tinting or bleaching can help. Apply a gentle bleach mixture to the knots only, monitor the process closely, and neutralize immediately when the knots lift slightly in color. Alternatively use a tint that matches your scalp for a non-chemical approach.
Step 4 — Apply adhesive safely
For a “melted” finish, choose a thin layer of skin-safe lace glue or gel. Apply in small amounts along the hairline, allowing it to dry to tackiness before setting the lace. You can use a brush or applicator for precision. Avoid thick globbed application—thin, even coats yield the best blend. Remember to breathe fresh air and work in a well-ventilated space if using aerosol spray adhesives like freeze spray.
Step 5 — Secure and press
Once adhesive is tacky, gently lay down the lace starting from the center and working outward. Use a fine comb or a clean toothbrush to press lace into the adhesive. Employ a silk scarf or elastic band for 10–20 minutes to ensure solid contact and flatten edges. This produces the primary “melt.”
Step 6 — Heat-assisted finishing (use caution)
If you choose to use heat to deepen the melt, keep it safe: use a blow dryer on cool or the lowest warm setting held 8–10 inches away. Never press a hot iron directly onto lace. A handheld clothing steamer can be used briefly to relax edges, but always keep a fabric buffer and maintain distance to prevent lace damage. Heat is optional—well-applied adhesive, makeup blending, and styling typically suffice.
Step 7 — Create baby hairs and style
Trim fine baby hairs and style them using edge control gel to replicate a natural growth pattern. Feather-edge the baby hairs to avoid a stark line. Use small intermittent strokes with a toothbrush to blend these baby hairs seamlessly into the rest of the hair.
Step 8 — Final makeup and sealing
Use a small brush and a matching concealer or foundation to blend the lace into the scalp. Add a thin layer of lace sealant if you need extra hold for several days. Sealants can increase water and sweat resistance, but choose formulations recommended for lace wearers to avoid brittle lace or skin irritation.
Advanced pro tips for a flawless melt
- Thin coats win: When applying glue, less is more—build thin layers rather than one thick layer to avoid edges lifting or visible residue.
- Match knot color: Bleaching or tinting knots to the right shade reduces contrast and makes the lace look like skin.
- Vary baby hair texture: Cut and style baby hairs at different lengths, then lightly press with low-heat tools for a natural, lived-in look.
- Edge placement: Keep the frontal slightly back from the true hairline to mimic natural recession and avoid a “wiggy” look.
- Use matte products: Glossy glues and heavy serums can reflect light and give away the hairline—matte options are preferable for invisibility.
Common mistakes to avoid
Rushing through the adhesive drying time, over-plucking, using high heat on lace, or selecting the wrong shade of tint are frequent errors. Also avoid applying adhesive to irritated or recently waxed skin. If you experience burning or stinging, remove immediately and consult a professional.
Troubleshooting: lifting, visible knots, irritation
If edges lift, clean the area with alcohol and reapply with a thinner glue layer. Visible knots may need a touch-up tint or additional plucking. For irritation, stop using adhesives and rinse with mild soap and water; apply a cold compress and seek medical advice if symptoms persist. Always use a proper adhesive remover for safe take-down.
Removal and maintenance
Removing a frontal should be as gentle as the application. Soak the lace edge with a professional adhesive remover, allow it to penetrate, then lift slowly with a comb or fingers. Do not rip off lace—this damages the frontal and can harm your skin. Clean adhesive residue from the lace with a gentle cleanser and alcohol-free makeup remover if necessary. Store frontals on a mannequin head or satin pillow when not in use to keep the hairline and lace shape intact.
Choosing between glue, tape, and glue-less methods
Glue offers longevity and a very tight melt but requires careful removal. Tape is quick and less messy for short-term wear. Glue-less methods like adjustable bands or combs are kinder to the hairline and scalp when frequent removal is needed. Consider your lifestyle, skin sensitivity, and how long you plan to wear the frontal between maintenance sessions.
Checklist: 10 quick steps to melt a lace frontal wig like a pro
- Clean and degrease the hairline.
- Customize the lace and pluck the hairline sparingly.
- Treat knots by tinting or bleaching if necessary.
- Apply thin adhesive coats and allow tackiness.
- Lay lace starting from the center outward.
- Press with a toothbrush and secure with a scarf.
- Optional: finish with cool/low heat or steam briefly.
- Blend with makeup and add baby hairs.
- Seal with a suitable sealant for longevity.
- Remove gently with appropriate adhesive remover.
How often should you re-melt or reapply?
Frequency depends on adhesive type and your activity level. Professional-grade adhesives can last 1–3 weeks; tapes often need replacement in 5–7 days. If you notice lifting, reapply local spots rather than removing the entire frontal. Always follow product manufacturer guidelines.
Summary and final advice
Mastery of how to melt lace frontal wig combines preparation, careful product selection, and precise technique. Prioritize skin safety, use thin adhesive layers, and aim for gradual, feathered hairline customization. With practice, you can achieve a natural, breathable, and long-lasting melt that withstands daily movement and looks effortlessly realistic.
Frequently Asked Questions
- Q: Can heat tools melt lace directly?
- A: No—direct high heat will damage lace. Use cool or low heat from a blow dryer at a safe distance or brief steam with a fabric buffer. Avoid flat irons on lace itself.
- Q: How do I make the knots look less dark?
- A: Knot tinting or light bleaching can reduce visibility; alternatively, use concealer or lace tint matched to your scalp after application.
- Q: What is the safest adhesive for sensitive skin?
- A: Look for adhesives labeled dermatologically tested, hypoallergenic, or formulated for sensitive skin. Always patch-test first and consult professionals for persistent reactions.

By following these tailored, step-by-step techniques and integrating the tips above, you can achieve a professional-quality melt without sacrificing safety or longevity—delivering a seamless, natural-looking hairline that complements your style.
Related products
Blog
- can you dye wigs - Expert Tips and Step by Step Guide to Dye Human and Synthetic Wigs at Home
- How to keep a wig from slipping - proven solutions and 12 easy steps for a secure fit
- how to dye synthetic wig safely at home step-by-step guide for long-lasting vibrant color
- are you allowed to wear wig for state id Explore DMV rules, photo requirements and expert tips for a smooth ID photo
- what does the slang word wig mean and how to use it correctly with origins and real examples
- Expert care tips to maximize wig longevity - how long can a lace front wig last
- simply wigs guide 2025 - expert reviews and top affordable natural styles
- how to secure wig safely with tape pins and grips for all day comfort