How to Make Wigs Look Natural with Pro Styling Tips for a Realistic Hairline

how to make wigs look natural: professional essentials and an approachable guide
Creating a believable, realistic wig starts with thoughtful preparation, the right materials, and practiced techniques. This detailed guide will walk you through why natural-looking wigs matter, what to buy, and step-by-step styling and maintenance strategies that pro stylists use every day. Whether you're new to wigs or refreshing a collection, these actionable methods will teach how to make wigs look natural while protecting the hairpiece and maximizing wear time.
Why achieving realism matters
Realistic wigs do more than look pretty: they restore confidence, provide seamless transitions in photos and video, and hold up better under daily wear. Achieving a believable hairline and natural density helps wigs blend with your skin and facial features, reducing the “wiggy” appearance that comes from blunt edges, visible lace, or unnatural parting. Below you'll find an organized roadmap—materials, customizations, styling, and care—designed to teach you how to make wigs look natural in a reliable, repeatable way.
Materials and tools you'll need
- High-quality lace front wig or full lace wig (choose HD lace or Swiss lace for finer results)
- Wig cap in your skin tone
- Wig grip or adjustable straps for secure fit
- Rat-tail comb, wide-tooth comb, and paddle brush
- Razor or thinning shears for cut-in techniques
- Blending makeup (foundation, powder, or concealer matched to skin tone)
- Brow gel, edge control, or styling gel for baby hairs
- Tweezers for knot-plucking and hairline customization
- Bleaching supplies (developer, bleach powder), if comfortable with chemical work
- Heat protectant, flat iron, curling iron, or hot rollers for styling
- Alcohol, medical adhesive (if using glue), or tape (if using hair adhesive methods)
- Silk scarf and mannequin head for styling and drying
Choosing the right base: lace, cap, and density
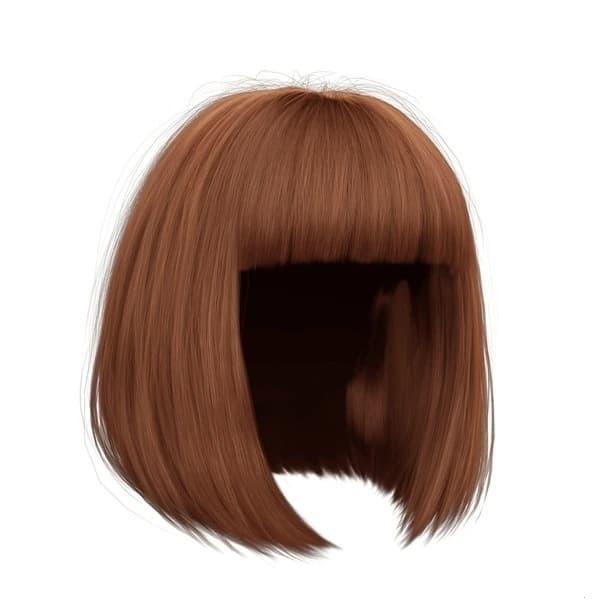
Start with a wig that has the right construction for your goals. Lace front wigs and full lace wigs provide the most realistic hairlines because each strand is knotted into the lace, mimicking natural hair growth. When learning how to make wigs look natural, pay attention to cap size (small, medium, large) and strand density. Heavy density can look bulky and artificial; medium density (130%–150%) is a versatile, realistic option for most styles. For fine hair appearances choose 100%–130% density.
Skin tone and lace color
Match the lace tone to your skin, or plan to tint the lace with lace tint, foundation, or tea staining. HD lace blends more easily with different skins, and slight tinting will reduce the visible contrast where lace meets skin. This step is a quick win when learning how to make wigs look natural.
Preparing the wig: pre-styling rituals
Proper preparation makes final styling easier. Wash and deep-condition human-hair wigs before cutting, plucking, or heat styling to remove factory residues and set a clean baseline for customization. If using synthetic wigs, use products specifically formulated for synthetic fibers and avoid high heat unless the fiber is heat-friendly.
Plucking and creating a believable hairline
Tweezing is one of the most transformative steps. Work slowly and sparingly to remove excess knots along the hairline and part. Start with a light pass and step back frequently—over-plucking creates unnatural gaps. Focus on irregularity: a natural hairline isn’t perfectly symmetrical. This controlled randomness is a key secret in tutorials about how to make wigs look natural.
Bleaching knots safely
Bleaching the knots reduces the visible black dots where hairs are tied to the lace, especially with darker hair. Mix a gentle developer with bleach powder and apply carefully to the underside of the lace, avoiding prolonged exposure that weakens knots. Neutralize with a color-safe shampoo and condition afterward. If you’re uncomfortable, seek a pro to avoid damage.
Custom parting and root shading
Perform a realistic part by creating a slightly off-center or natural-looking zone rather than an unnaturally straight line. Use a tail comb to style a tooth-like, soft part and apply a little concealer or powder along the part to mimic a scalp. For dimension, add subtle root shading with a powder or hair color spray—this recreates the slight variations you see on natural hair and is essential for convincing results when learning how to make wigs look natural.
Adding baby hairs and soft edges
Baby hairs are small hairs around the hairline that break up the edge. Gently cut and thin a few strands along the circumference of the frontal, then lay them down with a light edge control or mousse. Use a small toothbrush or spoolie for precision. Keep baby hairs proportional and never overdo them; the goal is subtle blending, not theatrical framing.
Securing the wig without giving away the secret
How you secure a wig affects its realism. A well-fitted wig cap and adjustable straps prevent shifting, and adhesives can provide a seamless bond when applied correctly. If using glue, apply thin layers, allow tackiness, and press lace gently into place. Remove adhesive residue with medical-grade adhesive remover to prevent damage. For many daily looks, a wig grip combined with comb anchorage is enough to create a secure, natural appearance.
Styling techniques that enhance realism
- Heat and texture: Use a heat protectant and model hair in small sections. Mix straight and soft waves to avoid a single-texture finish that looks synthetic.
- Layering and face-framing: Cut long, soft layers to frame the face. A razor technique creates feathered ends that look like natural growth.
- Thinning bulky areas: Use thinning shears to reduce bulk at the crown and sides; this creates movement and a more believable silhouette.
- Root lift: Backcomb at the roots and apply a texturizing spray for lift; natural hair rarely lies perfectly flat.
Color matching and blending
Choosing an appropriate shade and undertone is vital. Compare wig color in natural light and consider highlights that imitate natural sun exposure. Subtle balayage or babylights give depth without obvious striping. When in doubt, slightly darker root and warmer mid-lengths mimic natural growth patterns and aging.
Makeup and skin blending tips
To hide lace and improve the blend between wig and forehead, apply a thin layer of foundation matched to your skin on the lace or directly on the part. Use a little translucent powder to set and avoid shine. For people with receding hairlines or distinctive forehead shapes, a strategically placed fringe or side-swept bang can mask the transition without altering the wig drastically.
Maintenance for longevity and consistent realism
Good care keeps a wig looking natural over time. Wash gently (or as recommended for synthetic fibers), air-dry on a mannequin head to preserve shape, and store on a stand or in a breathable bag. Regularly refresh the part and baby hairs and reapply adhesive only when necessary. Avoid heavy oils and silicones near the lace, as buildup reduces adhesion and causes an unnatural sheen.
Common mistakes and how to avoid them
- Plucking too much—creates gaps and unrealistic density.
- Using heavy products on the lace—glue and makeup buildup reveals the line.
- Neglecting cap fit—slippage exposes the hairline and undermines realism.
- Over-straightening—makes hair look synthetic; mix textures for a natural finish.
- Uniform color—lack of dimension makes wigs look painted; add subtle highlights.
Advanced tips professionals use
Color melting is a technique where shades are blended seamlessly from roots to ends to mimic natural gradation. Root smudging uses a tiny brush to add nuanced darker pigment at the base. For lace-less transitions on short styles, micro-cuts and partial trims along the hairline create a natural shadow. Strategic perming or setting with rods can create long-lasting natural waves that don't lose shape under humidity.
Face-shape and style pairing
Choose styles that flatter your face shape: soft waves add width for long faces, angular layers frame round faces, and gentle side parts soften square jaws. Tailor volume placement—less at the sides for a heart-shaped face and more crown height for shorter faces. Matching cut and density makes wigs appear custom-fit to each individual's proportions, a subtle but important part of learning how to make wigs look natural.
Seasonal and activity-based adjustments
Hot weather calls for lighter densities and breathable cap designs; winter may allow fuller textures. For active wear, consider lace ventilation and secure adhesives or tape tabs to prevent slippage. Swim-safe wigs exist but require extra sealing techniques. Always rinse and reapply adhesives after heavy sweating or water exposure to maintain the illusion of a natural hairline.
Home-friendly quick fixes
Short on time? Apply a thin layer of pressed powder along the part for instant depth, use a flat iron to tame frizz and create a smoother scalp mimicry, and use a silk scarf for 10–15 minutes to set baby hairs and edges. Quick plucking can soften a harsh hairline in minutes without a full customization session.
Choosing between synthetic and human-hair wigs
Human hair offers the most realistic movement and heat-styling flexibility, making it easier to replicate natural textures. High-quality heat-resistant synthetics have improved dramatically and often come pre-styled in wearable shapes that require minimal fuss. Consider lifestyle, budget, and desired longevity when deciding—each material has pros and cons when building a realistic look.
Cost vs. realism trade-offs
Higher cost often buys better base construction (hand-tied, finer lace) and human hair. Still, intelligent customization can elevate a mid-range piece: targeted plucking, tinting, and layering can convert an affordable wig into a convincing, long-lasting style. When budgeting, prioritize lace quality and cap fit—these elements most directly impact how viewers perceive naturalness.
Professional services worth investing in
If you want guaranteed results, salons can professionally tint lace, bleach knots safely, and custom-cut wigs to match your facial features. Experienced stylists also know subtle asymmetries that enhance realism. Use professionals for permanent or high-risk alterations, and practice at home for routine adjustments.
Summary: a step-by-step checklist
- Select a suitable lace and density.
- Wash and prepare the wig before any cutting.
- Pluck sparingly; bleach knots if needed.
- Customize the part with shading and soft edges.
- Create modest baby hairs and lay them with edge control.
- Secure the wig with proper fit, adhesives, or grip bands.
- Style with mixed textures and face-framing layers.
- Maintain with gentle care, correct storage, and periodic touch-ups.
By following this sequence and applying targeted techniques, you will consistently learn how to make wigs look natural in photos, video, and everyday life. The secret is a combination of good base choices, subtle customization, and realistic styling rather than extreme or uniform changes.
Pro product suggestions and naming conventions
When shopping, look for terms like “hand-tied,” “HD lace,” “pre-plucked,” and “monofilament” for improved realism. For adhesives, “medical-grade” and “latex-free” options reduce irritation. Select sulfate-free shampoos and silicone-free conditioners for longevity. Texturizing sprays, light-hold gels, and heat protectants labeled for human hair will give the best results for longevity and natural movement.
Troubleshooting: quick fixes for common problems
If lace shows: tint with foundation or lace tint, or use a slightly darker powder along the hairline. If the part looks fake: add baby hairs, pluck, and apply part powder. If hair looks too thick: thin with shears and add layers. If the wig slips: tighten straps, use a wig grip, or add adhesive tabs. These small adaptations ensure your approach to how to make wigs look natural remains flexible and responsive.
Encouragement and next steps
Patience yields the best, most believable results. Practice on a mannequin head and document your progress with photos taken in natural light. Over time, you’ll develop instincts for density, part positioning, and texture mixing. Remember: small, deliberate changes beat dramatic overhauls when realism is the goal.
Further reading and learning channels
Look for tutorials that focus on lace manipulation, knot bleaching, and razor cutting techniques. Workshops and certified salons can accelerate skill-building. Combining video learning with hands-on practice is the fastest path to consistent, realistic outcomes.
Ready to transform your look? Start with one small edit—like tinting the part or adding baby hairs—and evaluate the difference in natural light. Each improvement compounds toward the final, convincing result: a wig that looks like real, lived-in hair.
FAQ
How often should I wash a human hair wig to keep it natural-looking?
Wash it every 8–12 wears or when product buildup occurs. Use a mild, sulfate-free shampoo and condition lightly. Avoid over-washing which strips natural oils and leads to dryness.
Can I bleach knots at home safely?
Yes, if you follow instructions carefully, use low-volume developer, and work in small sections. If unsure, consult a professional to prevent over-processing that weakens knots and causes shedding.
What's the easiest tweak to improve realism instantly?
Adding part powder or concealer to create scalp depth and making a few baby hairs along the hairline are quick and effective fixes that transform appearance immediately.
Related products
Blog
- what is wig blindness explained in plain English – an expert guide to causes myths symptoms and prevention
- how to cut a short wig - simple step by step guide to stylish layers and a natural finish
- How to Tuck Long Hair Under a Wig Easily and Securely with Step by Step Tips for Smooth Results
- does taylor swift wear a wig Exploring 7 Myths, Onstage Styling and Real Life Hair Evidence
- how to do a bleach bath for wig - step by step DIY guide with safety tips and color care
- does kevin corke wear a wig investigated - photo comparison, stylist insight and what the evidence really shows
- what is wig density explained and why it matters for volume, fit, and styling
- does sylvester stallone wear a wig A fact check on his hair history and onscreen look