how to make wig braids step by step guide with pro tips for natural looking long lasting styles
Mastering the art of creating natural-looking wig braids: a comprehensive how-to
If you are searching for reliable, step-by-step advice on how to make wig braids that look authentic and last, this long-form guide will walk you through every stage from material selection to finishing touches. Whether you're a stylist, wig-maker, or an enthusiast learning to craft protective styles on wigs, the techniques below emphasize realism, durability, and professional finish. Throughout the text you'll find practical workflows, pro tips, common pitfalls and creative variations to adapt the braid structure to any look.
Why learning how to make wig braids matters
Creating braid styles on a wig is different from braiding directly on natural hair. You control density, parting, and foundation. A well-made braided wig offers convenience, repeatability, and the ability to achieve ideal symmetry. Understanding materials, tension management and attachment methods is critical to producing a finished piece that reads as natural when worn.
Essential supplies and preparation
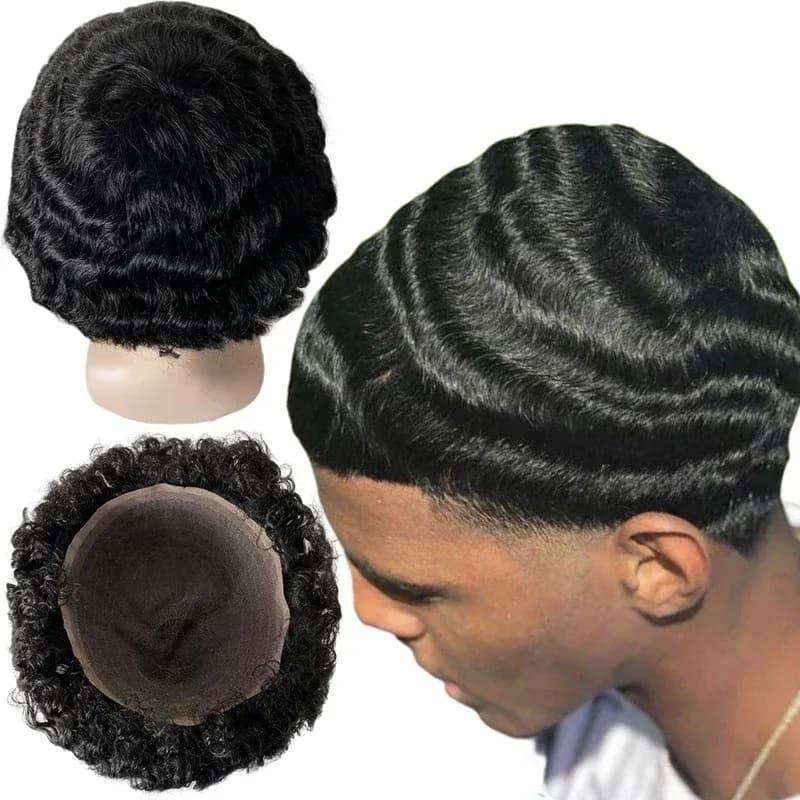
- Base wig or unit: Choose a full-cap wig or a ventilated lace cap. Quality lace or monofilament will give a more realistic scalp appearance.
- Braiding hair: Kanekalon, Toyokalon, or premium synthetic fibers that match color and texture will impact the end look. Pre-stretched or pre-looped hair saves time.
- Tools: Rat-tail comb, duckbill clips, hairpins, curved needles for sew-in anchors, braided needle and thread, weaving thread, wig head into a padded stand.
- Adhesives and sealants: Wig glue for edges (optional), clear gel or edge control for smoothing, braided hair wax or pomade to reduce frizz.
- Finishing products: Heat seal tools (if using heat-safe fibers), fabric shears for trimming, styling mousse to compress and set braids, and a light hairspray for sheen.
Preparing the wig foundation
Start by placing the wig securely on a block head and use T-pins to anchor. If you want a realistic scalp, map out parting lines on the lace or cap using chalk pencil or a washable marker. A natural hairline often requires shallow, uneven parting and slightly irregular braid placements — avoid mirror-symmetric grids unless the design calls for a geometric aesthetic.
Key prep steps
- Condition and detangle the synthetic or human hair to be braided; for synthetic strands, use a specialized conditioner and allow full drying.
- Trim the cap if necessary and reinforce the perimeter with a narrow strip of sewing braid or with clear fabric glue to prevent stretching during braiding.
- Measure and section the foundation with the rat-tail comb to establish braid size and spacing.
Step-by-step braiding workflow (core method)
The following workflow is designed for medium-thick box braids on a wig but is adaptable for cornrows, tree braids, or goddess braids.
- Sectioning: Create clean triangular or square sections depending on the style. Consistent section shapes promote uniform braids. Use clips to hold unworked areas.
- Anchor technique: For each section, use a small weft of hair or a short sew-in loop to attach the braid's start to the cap. Stitch through the cap with a curved needle and knot securely but do not over-tension.
- Adding hair: Place the synthetic extension hair beneath the section base and incorporate it evenly as you braid down. Maintain finger tension to avoid lumps or loose areas.
- Braid length control: For a natural fall, taper the ends slightly or use a small elastic to secure the last centimeter before sealing.
- Sealing ends: For heat-safe synthetics, dip braid ends in hot water briefly to set the finish. For others, knot and secure with a small amount of clear glue followed by trimming for uniformity.
- Hairline refinement: Use thinner strands at the front, carefully laying baby hairs and blending with mousse for a realistic edge.
Advanced pro tips for realism and longevity
Below are professional considerations that separate a good wig from a great one when learning how to make wig braids:
- Staggered parting: Avoid perfectly aligned rows at the hairline. Slight offsets mimic natural follicle distribution.
- Density variation: Vary braid thickness across the cap — slightly thinner at temples and nape for a believable silhouette.
- Root concealment: Use darker fibers near the base and lighter tones towards mid-lengths to simulate sun-affected hair. A subtle color melt adds depth.
- Natural scalp illusion: For lace zones, lightly paint the underside with semi-matte foundation matching skin tone and apply minimal baby-hair integration.
- Tension calibration: Consistent, gentle tension prevents cap distortion; test a sample row first to set your finger pressure.
- Seam blending: When you reach weft joins, reverse-stitch the join under the next braid to camouflage bulk.
Common variations and creative adaptations
Different looks can be created from the same base technique:
- Micro braids: Use finer sections and pre-stretched ultra-fine fibers for a wispy, long-lasting effect.
- Chunky protective braids: Larger sections give a bold statement and shorten creation time.
- Feed-in faux-locs: Gradually add hair to create a loc-like taper and texture.
- Half-up styles and updos: Plan anchor points early to make styling into buns, ponytails or crowns secure.
- Accent colors and beads: Integrate highlights or metallic threads for bespoke accents while braiding.
Finishing touches that elevate credibility
Once braiding is complete, follow these finish techniques to produce a professional result:
- Trim stray fibers and sculpt the silhouette for symmetry.
- Apply a light sheen spray or oil spray sparingly to avoid a plastic look on synthetic hair.
- Secure the interior cap with adjustable straps or a sewn-in elastic band to keep the wig stable on the head.
- If creating a wearable piece for a client, test wear against a neutral backdrop to inspect how the scalp reads under varied lighting.
Maintenance and care for braided wigs
To ensure your braid work lasts and continues to look natural, follow a maintenance routine:
- Store on a mannequin head or hang to avoid flattening.
- Cleanse gently: use diluted shampoo and work away from braid bases; rinse thoroughly and air-dry on a stand.
- Re-seal ends after several wears if fraying occurs; small re-ties and heat dips help maintain shape.
- Avoid heavy products at the base to prevent slippage on the cap.
Troubleshooting common issues
If you encounter problems when you try how to make wig braids, these solutions can help:
- Bulky joins: Flatten wefts before starting and stitch joins under the next braid for hidden transitions.
- Visible cap: Add a thin layer of matching fiber at the root or adjust part depth to avoid cap exposure.
- Unnatural shine: Use matte finish sprays or dust with baby powder and brush lightly to reduce sheen.
- Loose braids: Re-anchor with an additional stitch and tighten the initial anchor without pulling the cap.
Workflow checklist before finishing
Use this quick checklist to ensure quality control:
- Consistent sectioning and braid thickness across the cap
- Secure anchors and hidden stitch points
- Even color transitions and natural root shading
- Edges blended and baby hairs shaped
- Ends sealed and trimmed uniformly
Time-saving strategies without sacrificing quality
Speed up the process while learning how to make wig braids by applying these tactics:
- Pre-section the wig cap with permanent markers for repeatable patterns.
- Use pre-looped hair to reduce handling time per braid.
- Work in teams: one person sections while another braids rows.
- Create templates for popular part maps to reproduce looks quickly.
Recommendations for different skill levels
Beginners should start with fewer, larger braids and practice tension control on inexpensive caps. Intermediate creators can refine parting and color blending. Advanced stylists should experiment with multi-texture integration, invisible stitches and lace-front finishing techniques to increase realism.
Safety and professional etiquette
When building wigs for clients, maintain sanitation, label custom units, and keep records of materials and construction methods so styles can be reproduced or altered later.
Resources for continued learning
Study professional tutorials, join wig-making forums, and practice on different cap types. Purchase quality tools and keep a swatch library of braiding fibers to quickly select materials that match skin tones and existing hair textures.
Final checklist and takeaway
In summary, learning how to make wig braids involves mastering foundation preparation, precise sectioning, tension management, realistic color blending and neat finishing. Prioritize practice, use the right materials for your chosen look, and always inspect your work under varied lighting. These steps will help you deliver long-lasting, natural-looking braid wigs with professional credibility.
If you want a concise starter protocol: 1) prep cap and plan parting; 2) anchor each braid; 3) feed and maintain tension; 4) finish and seal ends; 5) style and store properly. Repeat and refine to improve speed and consistency.
Creative projects and inspiration
Try combining micro-braid crowns with chunky side braids, or integrate faux locs with colorful thread wraps to create signature pieces. Photograph your progress in a consistent setup to build a portfolio and document your methods for client consultations.
How to price handmade braided wigs
Factor in time, materials, complexity, and finishing work. Special techniques like hand-knotted hairlines, multi-tonal blending, and lace-front integration should command higher rates.
Wrapping up
When executed with attention to detail, the techniques described will allow you to replicate salon-grade styles and design bespoke braided wigs that appear natural and withstand regular wear. Whether practicing the fundamentals of how to make wig braids or refining advanced finishes, the core principles of parting, anchor security, tension control, and realistic color transitions will always guide your work.
FAQ
Q: Can you braid directly onto any wig cap?
A: Not all caps are ideal. Lace fronts and sturdy monofilament caps provide more realistic parts and better anchor points. Choose the cap based on the desired finish.
Q: How long does a braided wig last?
A: With proper care, a well-constructed braided wig can last months. Factors include fiber quality, how often it's worn, and maintenance routines.
Q: Is heat required to seal synthetic braid ends?
A: Heat-dip sealing works well for heat-safe synthetics; for other fibers, use neat knots and clear glue or a small sewn cap finish to prevent unraveling.
Related products
Blog
- how to fix a wig that is frizzy — 8 easy DIY tricks to restore smooth, natural-looking hair
- Laugh-Out-Loud Funny Wigs for Parties and Pranks That Steal the Show
- how to make lace front wig - step-by-step DIY guide for natural seamless results
- why is tracy townsend wearing a wig explained and the surprising truth behind her hair choice
- Wig Fever Unleashed - Ultimate Guide to 2025 Trends, Care Tips and Where to Buy Quality Hairpieces
- is britt robertson wearing a wig in the merry gentlemen find out whether her hairstyle was a wig and the on-set hair secrets
- do you wanna taste it wig wam lyrics revealed with meaning analysis and singalong tips
- How to Spot a Real donald trump wig and Where to Buy the Best Styles for Every Budget