how to make a wig look more natural: practical steps to a believable hairline and blend
Achieving a realistic wig is less about expensive pieces and more about technique, patience, and a few clever tricks. If you've ever wondered how to make a wig look more natural when you part it, style it, or walk into a bright room, this comprehensive guide will walk you through expert tips, subtle customizations, and maintenance routines that transform a wig from obvious to authentic-looking. The goal is a seamless scalp illusion, soft baby hairs, and movement that mimics natural growth.
Why naturalness matters: the psychology and practical benefits
People notice small details: a uniform hairline, visible scalp when parted, and soft front hairs all contribute to authenticity. Beyond aesthetics, a natural-looking wig boosts confidence, allows for versatile styling, and reduces the need to hide under hats or scarves. Learning how to make a wig look more natural will help you feel comfortable in more settings and let you style with freedom.
Essential tools and supplies before you start
- Shears and thinning scissors – for subtle texturing of the hairline and layers.
- Tweezer or lace plucker – to remove excess knots for a less uniform hairline.
- Scalp-matching powder or foundation – to camouflage knots and mimic the scalp color in partings.
- Lace tint or tea-staining supplies – to reduce the stark contrast between lace and skin.
- Adhesives, gels, or wig tape – to secure lace front wigs and flatten the hairline.
- Heat tools – blow dryer, flat iron (if hair type allows) and a hot comb for smoothing.
- Needle and ventilating thread
 – for advanced customization like adding baby hairs or re-ventilating areas.
12 expert tips to make any wig look more believable
Customize the hairline with careful plucking
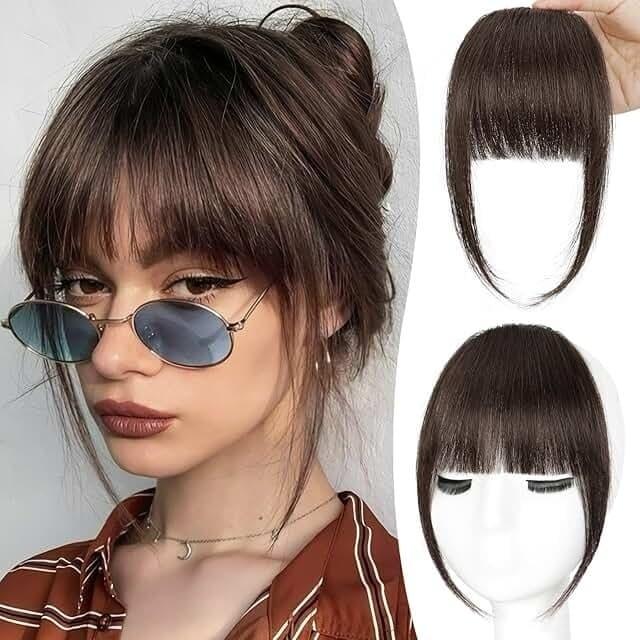
Start by softening the straight factory hairline. Use a tweezer or a lace plucker to remove small clusters of hair—work slowly and step back frequently. Target the frontal 1-2 inches and create minor irregularities rather than a straight, repetitive pattern. Over-plucking leads to gaps; under-plucking keeps the wig looking too dense. Remember, how to make a wig look more natural often begins at the hairline.
Create baby hairs for realism
Baby hairs mimic newly grown strands and break up the rigid edge of lace. Cut a few short pieces at the front and slightly thin them with thinning shears. Use a small amount of styling gel or mousse and a toothbrush to lay them down. For lace front wigs, add baby hairs on both sides of the forehead and near the part to enhance the scalp illusion.
Tint or bleach knots carefully
If dark knots show through light lace, tinting or bleaching can make knots less visible. Use a knot bleach kit sparingly and follow instructions precisely. Alternatively, use a transparent lace tint spray or tea-staining for a warmer look. After bleaching, neutralize brassy tones and reseal the lace with a gentle conditioner if needed.
Match the scalp color inside the part
Use a brow powder, foundation, or specialized wig concealer along the part to simulate scalp color. Apply product with a fine brush and blend gently into the lace. This trick is essential for how to make a wig look more natural when parting wide or wearing updos that expose the scalp.
Thin the density in the frontal area
Factory wigs can be overly dense near the hairline. Use thinning shears to remove bulk while maintaining volume underneath. Cut in small sections and cross-check by moving the wig on a mannequin head or your own to ensure consistent results. This helps replicate the natural taper of hair from baby to mature strands.
Customize parting depth and position
Move the part slightly to match your natural hair growth pattern and face shape. For lace front wigs, create a shallow hand-tied part by plucking and applying scalp powder. Deep middle parts are trendy but can reveal too much lace unless properly matched and tinted. Experimenting with different part positions is a key part of learning how to make a wig look more natural.
Blend edges with makeup and adhesives
Apply a thin layer of adhesive or tape on the lace edge to lay it flat; then use foundation or concealer on the lace to match your skin tone. After the glue sets, gently press the lace with a buffing sponge. For quick fixes, a light dab of pressed powder can reduce shine and help the lace disappear under camera flashes.
Use heat strategically to remove bulk and shape
For heat-friendly synthetic or human-hair wigs, use a flat iron or blow dryer to soften the hair and create natural fall. Curling with large barrels and then brushing out yields soft waves that behave like natural hair. Keep heat low to avoid damaging fibers and always use a heat protectant spray when necessary.
Create realistic parting by ventilating or adding extra knots
Advanced users can re-ventilate sections of the lace to create a more realistic density in the part or hairline. Adding single knots near the part gives an appearance of natural growth. If you prefer not to ventilate, strategically minimizing knot visibility with powder and plucking can achieve similar outcomes.
Layer and texturize the wig
Hair that moves in layers looks more natural. Ask a stylist to add long, face-framing layers or use thinning shears to introduce texture. Layers reduce the “wig helmet” effect and allow movement that mimics natural hair growth patterns—this is a fundamental approach to how to make a wig look more natural.
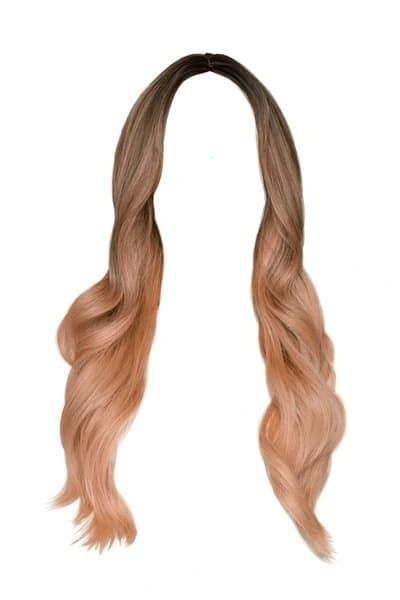
Color depth matters: add roots and highlights
Perfectly uniform color reads as artificial. Add root shading or subtle lowlights to create dimensional color. Use color sprays or dye (for human hair) to introduce darker roots and soft highlights. Rooted wigs or hand-painted color blends are easier to style convincingly and mimic real hair color variation.
Secure and style for a natural fall
How a wig sits affects realism. Use wig grip bands, adjustable straps, or tape to secure the cap so it doesn't shift. Position the hairline slightly forward or backward based on your natural growthline and avoid positioning the lace in an unnatural straight line. Accidentally revealing too much lace or too many tracks breaks the illusion.
Layered routine for daily wear and special occasions
Adapt your approach depending on wear frequency. For everyday: use lightweight blending products, minimal adhesive, scalp-matching powder, and gentle brushing. For events: do deeper customization—plucking, lace tinting, baby hairs, root shading, and a firm adhesive application. Each step targets how to make a wig look more natural under different lighting and close attention.
Common problems and quick fixes
- Visible knots: Apply concealer or tinted powder, or consider knot-bleaching done by professionals.
- Shiny synthetic fibers: Use dry shampoo or texture sprays to reduce sheen and create a matte finish.
- Too much density at the hairline: Use a razor or thinning shears to soften the edge.
- Hairline lifts: Reapply adhesive, add a wig grip band, or reposition the cap.
Styling techniques to enhance authenticity
Blunt cuts often look wiggy; prefer soft graduation and face-framing layers. For curly wigs, scrunch with mousse and diffuse rather than high-heat straightening. For straight wigs, introduce subtle bends near the ends or around the face to break up the rigid lines. Part styling is critical: a slightly off-center part often reads as more natural than a perfect centerline.
Maintenance tips that preserve realism
Wash your wig gently with sulfate-free products, avoid over-washing, and store on a mannequin head to retain shape. Refresh the lace and edges between washes with dry shampoo and a light spritz of leave-in conditioner for human hair. Reapply scalp powder and touch up roots as needed—consistent upkeep is essential if you've invested time into customizing how to make a wig look more natural.
When to seek professional help
If you're uncomfortable with bleaching knots or re-ventilating lace, consult a professional wig maker or stylist. They can perform surgical-level customizations such as hand-tying a new hairline, implanting baby hairs, or re-coloring for a precise scalp match. Professional services are worth the investment when you want long-lasting natural results.
Bonus quick checklist: a one-minute pre-step before stepping out
- Brush or finger-comb the frontal area to set baby hairs.
- Apply a small dab of concealer along the part.
- Press the lace with a warm, not hot, flat tool to ensure adhesion.
- Check in natural light for visible knots or lace shadowing.
SEO and styling notes for content creators
When writing or producing visual guides about how to make a wig look more natural, include close-up before-and-after images, step-by-step tutorial videos, and product recommendations with clear affiliate disclosures where applicable. Use headings like plucking a natural hairline, tinting the lace, and creating baby hairs to capture common search queries and answer intent. Structured data, alt text, and transcriptions also reinforce search relevance for targeted phrases.
Materials comparison: synthetic vs human hair for realism
Human hair typically wins for naturalness due to authentic texture, heat styling tolerance, and ability to take color treatments. Modern heat-friendly synthetics are improving, offering realistic fibers at lower cost. When optimizing for how to make a wig look more natural, weigh budget, styling goals, and the time you're willing to spend on maintenance.
Cost-effective tweaks that deliver big results
Small investments can make major improvements: a high-quality wig cap to smooth bulk, a good blending foundation to match the lace, and a set of thinning shears. These items are more economical than replacing the wig and often deliver similar visual upgrades.
Wrapping up: habit-driven mastery of a natural look
Learning how to make a wig look more natural is iterative. Start with small adjustments—plucking, adding baby hairs, matching the scalp—then progress to advanced tasks like ventilating or color blending as you gain confidence. Keep notes on what works for each cap and style so you can reproduce the process quickly. Over time, these habits create a consistently convincing illusion that looks effortless.
Whether you’re new to wigs or a seasoned wearer, the combination of proper tools, patience, and these steps will help you achieve a believable hairline, lifelike parting, and movement that reads as authentic hair. Emphasize subtlety: naturalness thrives on small, intentional imperfections rather than perfection. Master those, and you’ll have a realistic result every time.
Further reading
Explore tutorials on lace tinting, knot bleaching, and ventilating if you want to deepen technical skills. Video demonstrations paired with step-by-step written instructions often speed the learning curve.
FAQ
Q: Can I make a synthetic wig look natural without heat?
A: Yes. Use texturizing sprays, matte powders, and careful thinning. Create waves using foam rollers or braids and set with cool air or a diffuser where the fiber allows.
Q: How long does customization last?
A: Many customizations like plucking, tinting, and baby hairs last the life of the wig, but maintenance matters. Scalp powders and adhesives require reapplication; color may fade with washing and wear.
Q: Is it safe to bleach knots myself?
A: It can be risky if you’re inexperienced—over-bleaching weakens knots and strands. Consider professional services for high-value wigs; otherwise follow a tested kit and perform strand tests first.