how to install a wig with glue step by step with pro tips for a secure natural hairline
Mastering a Professional Install: A Complete Guide on how to install a wig with glue
Confidently attaching a lace front or full lace unit is a craft that merges technique, high-quality products, and careful preparation. This comprehensive tutorial explains step-by-step methods, pro tips, and troubleshooting strategies to help you achieve a secure, natural-looking hairline when you learn how to install a wig with glue. Whether you're new to adhesives or refining your approach, this guide offers in-depth explanations of materials, skin and wig prep, application procedures, finishing touches, and maintenance.
Why adhesives? Understanding the basics
Adhesives (glue) provide one of the longest-lasting, smoothest hairline appearances when applied correctly. Compared to tapes, certain glues can offer superior hold, especially for active lifestyles or extended wear. However, safe and effective use requires knowledge about glue types, curing times, skin sensitivity, and removal techniques. Repeating the core phrase how to install a wig with glue throughout this write-up ensures the most relevant tips are emphasized for search engines and readers alike.
Key components and tools you’ll need
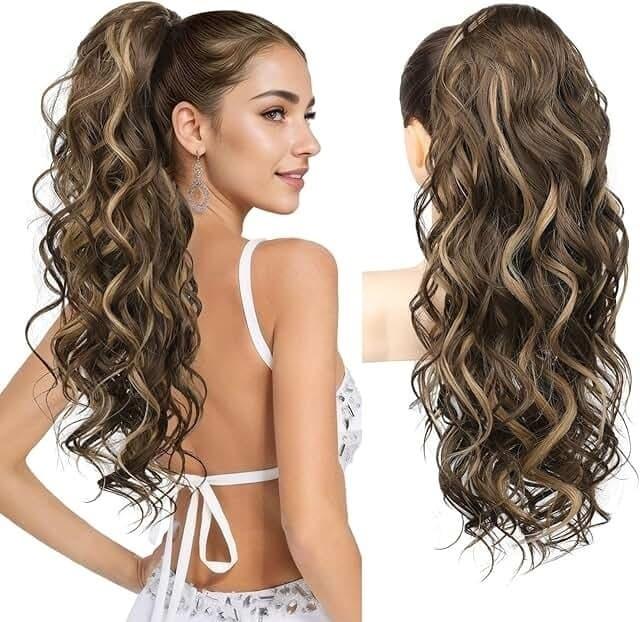
- Wig: lace frontal, 13x4, or full lace unit with pre-bleached knots for a natural look.
- Adhesives: solvent-based glues and water-based adhesives; common choices include ethyl cyanoacrylate blends and medical-grade water-based formulas.
- Adhesive remover: safe remover (acetone-free options) for gentle, thorough removal.
- Edge control and gel: to smooth baby hairs and control flyaways.
- Rubbing alcohol: 70% for skin degreasing.
- Barrier: skin protector or liquid tape for sensitive skin.
- Tweezers, small scissors, and rat-tail comb: for lace handling and parting.
- Blow dryer (cool/low heat): speeds up drying and curing.
- Makeup: concealer/Foundation matched to skin for blending the lace.
- Scalp stencils, clips, and headband: help keep wig secure while glue sets.
Pre-installation: Preparation is 60% of the result
Before you apply any adhesive, spend time preparing both your scalp and your wig. Good prep reduces lifting, irritation, and creates a natural hairline. Below are precise steps:
- Cleanse the hairline: Use rubbing alcohol or a gentle clarifying toner to remove oils, makeup, and residue. Repeat until cotton is clean. Clean skin equals better adhesion and longer wear.
- Protect sensitive areas: If your skin reacts to adhesives, apply a thin layer of liquid skin protector (medical-grade barrier) to the perimeter where glue will meet skin. Allow it to dry thoroughly.
- Flatten natural hair: If you have hair, braid or cornrow it flat against the scalp. Use a wig cap or two to create a smooth, even base. For very short hair, a wig cap alone may suffice.
- Customize the lace: Pre-cut the lace carefully—trim close to the hairline, preserving small amounts of lace to avoid cutting into knots. Consider ventilating (tweezing) pre-made density for a soft transition. Practice on a mannequin head first.
- Bleach knots & tint lace if needed: If the knots are visible, perform knot bleaching or apply tint with a lace tint spray or makeup to match your scalp.
Step-by-step installation: precise actions for a secure natural hairline
Follow these numbered steps for a foolproof application of glue that keeps the hairline natural and long-lasting. The sequence below will walk you through how to install a wig with glue from start to finish.
- Test a small patch: Before full use, patch-test the adhesive on a small area of your skin to check for sensitivity. Wait 24 hours if you're unsure.
- Measure & mark: Using a light eyeliner or washable marker, map out where the lace will rest so the glue is applied precisely to the area that will be covered by lace.
- First glue layer (thin): Apply a thin, even layer of adhesive along the perimeter. For solvent-based glues, a thin layer provides initial grip and forms a base. Allow this layer to become tacky (usually 30-60 seconds depending on brand).
- Second glue layer (build): Add a second layer for a stronger hold if needed. For water-based adhesives, you may need to let the first layer dry slightly longer before applying another coat. Avoid globbing; smooth, even layers cure better and look more natural.
- Position the wig: While the glue is tacky, align the lace starting at the center front and gently press outward toward the temples. Use a fine-toothed comb or rat-tail comb to keep edges flush with glue. The phrase how to install a wig with glue emphasizes careful positioning as a critical skill.
- Press and set: Press lace into the adhesive using the pads of your fingers or a small rolling tool. Use a blow dryer on cool setting to accelerate curing. For increased hold, place a silk scarf or elastic band around the perimeter for 10–20 minutes.
- Create baby hairs & blend: If the unit has excess density at the hairline, carefully pluck and trim to mimic natural baby hairs. Use edge control gel to lay the baby hairs and blend the lace with skin using a little foundation or lace tint applied with a small brush.
- Seal the bond (optional): Use a lace sealer product along the edge to add a finishing protective coat. This increases resistance to moisture and sweat and can extend wear time.
Pro tips for a natural hairline and longer hold
- Always keep glue layers thin and even; thick puddles create bumps and make blending difficult.
- Work in small sections when pressing lace to maintain control and prevent misalignment.
- Use a skin protector if you have eczema, psoriasis, or reactive skin; this reduces risk of dermatitis.
- Choose adhesive based on lifestyle: water-based adhesives are gentler and easier to remove, while solvent-based often last longer for heavy perspiration.
- Warm up glue slightly (in the hands) before application in cold climates so it spreads evenly.
- After initial install, avoid washing hair for 24–48 hours to allow glue to fully cure.
Troubleshooting common issues
Even with careful application, things can go wrong. Below are targeted solutions to typical problems you might encounter when learning how to install a wig with glue.
Lifting at the temples
Often caused by grease at the oiliest part of the forehead or too much tension in the wig cap. Clean the area again with alcohol, add a thin bead of adhesive, press and dry. For recurring temple lifting, try pre-cutting a small notch in the lace to relieve tension, or use an additional anchor at the temple.
Visible knots or lace
If knots are still visible, either bleach them more subtly or apply a skin-colored concealer to the lace using a stippling motion. Avoid heavy makeup that can flake into the adhesive zone.
Irritation or rash
Stop using adhesive immediately, remove the wig with appropriate remover, wash area, and consult a dermatologist if severe. For future installs, use a hypoallergenic adhesive and always perform patch tests.
Removal and aftercare: protecting your skin and wig
Safe removal preserves both your scalp health and the integrity of the lace unit. Follow these steps every time you take the wig off:
- Soften the glue: Apply adhesive remover along the hairline and wait the recommended time to break down the bond. Work gently to lift the lace gradually.
- Remove slowly: Peel the lace back slowly from one side to the other, using more remover if you encounter resistance.
- Clean residual adhesive: On both the wig and your skin, remove leftover residue with a specific solvent-free remover or a gentle oil-based solution, then cleanse with mild soap and rinse.
- Rehydrate your skin: Use a non-comedogenic moisturizer or aloe vera gel to soothe and replenish the skin barrier after removal.
- Maintain the wig: Clean the lace and the wig cap according to manufacturer instructions. Replace glue residue carefully and avoid aggressive heat if your wig is human hair—especially when reapplying glue for reused units.
Choosing the right glue: a comparative view
Adhesives differ by composition, hold strength, drying time, and removability. Consider the following categories when choosing:
- Water-based adhesives: Gentler on skin, easy removal, good for short to medium-term wear.
- Solvent-based adhesives: Often provide the longest hold, great for heavy perspiration or humid climates, but require proper remover and skin care.
- Medical-grade adhesives: Hypoallergenic alternatives for sensitive skin; may be more expensive but safer for repeated use.
- Glue gels vs. liquids: Gels can be easier to control and less messy; liquids spread thinner and bond quickly.
How long can you expect the glue to hold?
With correct prep and good-quality adhesive, temporary applications can last 1–2 weeks; heavy-duty solvent-based systems can sometimes provide multi-week adhesion for single-install use. Longevity depends on skin oils, activity level, humidity, and how well the glue was cured.
Styling and maintenance while wearing the wig
To keep your look fresh and the bond secure for as long as desired:
- Use silk or satin scarves while sleeping to prevent friction that lifts the edges.
- Avoid excessive manipulation of the perimeter—frequent touching reduces bond life.
- When swimming, wear a swimming cap if possible; salt and chlorinated water can affect hold.
- Refresh edges with a tiny amount of adhesive or sealer when you notice slight lifting; always clean the area first with alcohol.
Advanced techniques for a pro finish
Pro stylists use subtle approaches to create the illusion of hair emerging naturally from the scalp. Consider integrating these advanced techniques into your routine:
- Bleaching and tinting: Lightly bleach knots and use a tinted foundation on the lace to match skin tone perfectly.
- Micro plucking: Remove specific hairs to replicate a widow's peak or natural density gradient. Perform minimally to avoid over-plucking.
- Scalp stenciling: Add subtle density or scalp shadows with makeup to enhance realism in deep parts.
- Sealing & protectants: Apply a breathable sealer over the adhesive edge to create a barrier against oils and water.
SEO note: incorporating the key phrase how to install a wig with glue several times in headings, descriptive text, and alt or label-like contexts improves page relevance for readers searching for detailed adhesive application tutorials.
Checklist: pre-install quick reference
- Wig is customized and lace trimmed
- Skin cleaned with alcohol
- Skin protector applied (if sensitive)
- Glue patch-tested
- Glue applied in thin even layers
- Lace pressed and secured, cooled, and sealed
- Edges styled and blended
Common myths debunked
Myth: More glue equals better hold. Reality: Excessive glue can cause lumps, irritation, and poor lace blending. Thin, multiple layers properly cured yield better results.
Myth: All adhesives are interchangeable. Reality: Adhesives vary widely—choose one that matches your skin sensitivity, desired wear time, and activity level.
Quality control: what to inspect post-install
After installing and setting your lace, inspect these points to ensure success:
- Is the lace flush with the skin without air pockets?
- Are the baby hairs and hairline density realistic?
- Did you achieve symmetry at corners and center part?
- Is the bond comfortable without tightness or pinching?
Safety first
Keep adhesives out of reach of children, avoid direct contact with eyes, and consult a physician for allergic reactions. Always use removers formulated for lace adhesives to minimize skin damage.
Final thoughts
Learning how to install a wig with glue takes practice, patience, and attention to safety and detail. Rehearse techniques on mannequin heads, experiment with different adhesives to find what suits you best, and always prioritize skin health. With the right prep, glue, and finishing touches, you can achieve a secure, natural hairline that lasts and looks professional.
Quickly repeatable pro routine
- Cleanse and protect skin
- Prep wig and trim lace
- Apply adhesive thinly and allow tack
- Secure lace starting from center front
- Press and cure with cool air
- Style baby hairs and seal
If you'd like to troubleshoot a specific problem—lifting, irritation, or a visible lace line—refer to the troubleshooting section above and consider consulting a professional stylist for personalized guidance.
Frequently Asked Questions
A: Most adhesives need 24–48 hours to reach optimal strength and cure. Avoid washing or heavy sweating during this period to ensure maximal bond longevity.
A: Yes, you can reuse a wig if you carefully remove glue residue from the lace and recondition the hair. Clean adhesive with a specialized remover and wash the lace gently before reinstallation.
A: Look for medical-grade, hypoallergenic, water-based formulations and always perform a 24-hour patch test before full application.
For best results, document each install—note adhesives used, curing times, and environmental conditions—so you can refine your method over time. With attention to detail and regular practice, the process of how to install a wig with glue will become intuitive and produce consistently natural results.
Related products
Blog
- does beyonce wear a wig — expert hairstylist analysis, timeline of looks and photographic clues
- Insider look at why does nicole kidman always wear a wig and what her hairstyle choices reveal about celebrity image
- does president macron's wife wear a wig - photos, expert analysis and the surprising truth about Brigitte Macron's hair
- How to Choose the Best Wig Human Hair for a Natural Look and Long Lasting Wear
- Walmart Wigs Trend Report 2025 — How to Choose, Style and Care for Affordable Looks
- White Wigs 2025 Guide to Choosing, Styling and Caring for the Perfect Look
- how to wash a synthetic wig without wig shampoo using 5 simple at-home tricks for soft tangle-free results
- Synthetic Wig Styling and Care Guide 12 Proven Tips for a Natural Look