how do you make your own wig - step by step DIY guide for beginners with creative tips and essential tools
:Time:2025-11-26T01:49:23+00:00Click:Person
how do you make your own wig: a practical, step-by-step home workshop for beginners
If you've ever searched "how do you make your own wig" and felt overwhelmed by terminology like ventilation, lace cap, or weft sewing, this comprehensive walkthrough will take you from blank canvas to finished headpiece with clear steps, smart tips, and realistic expectations. The goal is to help beginners learn proven methods — whether you prefer a lace-front hand-tied approach, a sewn-weft wig, or a hybrid — while keeping the process scalable, affordable, and creative. Read on for materials, tools, measuring tricks, detailed construction steps, styling advice, and maintenance best practices designed to optimize your search visibility and satisfy real-world needs.
Overview: pick the right approach for your lifestyle
First, decide which construction method fits your budget and time. When asking "how do you make your own wig", the most common methods are: hand-tied lace (most natural, most time-consuming), machine-sewn weft caps (fast and sturdy), and glue-less bobbin or silicone caps (temporary and beginner-friendly). Each method has trade-offs: natural movement, ventilation, and scalp realism vs. speed, durability, and cost. This guide focuses on accessible steps for beginners yet includes pointers to elevate quality as skills improve.
Essential tools and materials
Mannequin head or foam block with stand — secure base to work on.
Measuring tape — flexible fabric tape for accurate head measurements.
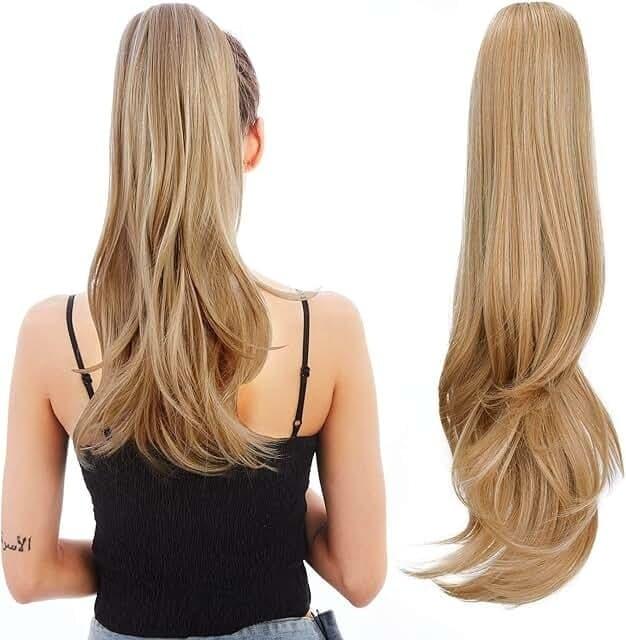
Wig cap (stocking cap), lace front, or machine cap — choose your foundation.
Sewing needle set — curved needles help when ventilating or sewing wefts.
Thread — nylon or polyester thread that matches the cap color.
Ventilating needle (knotting tool) for lace wigs or latch/curved needle for hand-tied knots.
Wefts (remy, synthetic, or human hair) or loose bundles if you plan to ventilate each strand.
Wig clips, combs, elastic band, and wig glue/tape for optional secure fitting.
Scissors, thinning shears, and razor — for detailed cutting and texturizing.
Heat tools if using human or heat-resistant synthetic hair: low-temp flat iron, curling iron.
Measure and plan (why accurate measurements matter)
Understanding head circumferences, front-to-back length, ear-to-ear across the hairline, and nape depth helps you choose the cap and estimate how much hair you need. Typical measurement steps when learning "how do you make your own wig": measure around the widest part of the head (circumference), from the front hairline over the apex to the nape, ear-to-ear across the top, and nape width. Write these down and sketch a simple pattern on paper; a well-fitted cap minimizes slippage and creates a natural-looking hairline.
Cap choice and patterning
If you choose a lace-front, you'll trace a hairline and mark where you want baby hairs, parting zones, and temple density. For a sewn weft cap, measure the skull and decide how many rows of wefts you need. Patterning also helps with planning hair density and determining how many bundles of human hair or how many yards of weft are required.
Step-by-step build: method A — lace front, hand-tied
Prepare the lace and mannequin: Stretch the lace over the mannequin head, align the front to the natural hairline you measured, and secure it with pins or a light sticky spray. Make sure the lace is taut but not overstretched.
Map the parting and orientation: Use a washable marker or pins to mark your desired part and the direction of hair flow. This will guide ventilating and knot placement so the result looks natural.
Ventilate the hair: Using a ventilating needle or a small hook, knot each hair strand into the lace. Beginners often choose single-ventilation (one strand per knot) in the frontal zone and double or triple in density areas. Take frequent breaks to avoid hand fatigue. The process is slow but gives the most realistic scalp illusion.
Create baby hairs and hairline variation: Pull out shorter strands and knot with lighter density around the perimeter. Use a toothbrush or small comb to style these hairs later.
Bleach knots or tint base if desired: To make knots less visible, bleach them carefully following safety precautions, or use a foundation tint that matches your skin tone.
Trim and style: Once enough knots are ventilated, trim long base threads, cut the lace carefully along the hairline, and style the hair into the desired look.
Step-by-step build: method B — sewn-weft wig (faster, popular for beginners)
Create a wig cap base: Use a stretch cap sized to your head or make a custom cap on your mannequin using elastic banding and a base fabric.
Sew horizontal rows: Starting at the nape, sew wefts in rows using a curved needle and strong thread. Overlap slightly at the ends to avoid gaps and increase longevity. Maintain consistent spacing for even volume distribution.
Build density toward the crown: Add more wefts near the crown and less toward the hairline, or use a lace frontal piece to ensure a natural-looking temple and frontline.
Attach front lace or create a frontal: If using a lace frontal, sew it to the front weft row. This hybrid method gives both realism at the hairline and speed from machine wefts.
Style and finish: Adjust layers, thin the top if needed, and install wig clips or an elastic band for fit security.
Altering hair density and texture
How do you make your own wig feel natural? Match the density to the look you want. Typical density percentages: 120% (natural), 150% (voluminous), 180%+ (very full). Use thinning shears to reduce bulk, sew lighter rows in frontal zones, and feather ends with a razor. For texture, choose raw bundles for natural movement, or pre-styled synthetic wefts for cost efficiency.
Techniques to make the hairline realistic
Key strategies include bleaching knots, customizing baby hairs, varying knot density, and plucking the part sparingly for a lived-in look. Use a light brow pencil or foundation on lace bases to match scalp color. When practicing "how do you make your own wig," focus on subtle asymmetry and fine transitional hairs — perfect symmetry often reads as fake.
Installation tips for secure, comfortable wear
Use adjustable internal elastic bands to secure the cap without adhesive.
Apply wig tape or skin-safe glue for lace fronts when you need longer wear.
Add wig clips at the temples and nape to anchor the piece.
Trim excess lace carefully and use small stitches to reinforce high-tension areas.
Styling, cutting, and finishing touches
Once your wig is built, shaping the cut will define the final style. Use sectioning, point-cutting to add layers, and thinning shears to remove bulk. For heat-friendly hair, low-heat irons and a quality heat protectant preserve fiber integrity. If you created the wig using human hair, treat it like natural hair: deep conditioning, gentle detangling, and protective storage (on a mannequin or in a silk bag).
Maintenance and longevity
Regular care extends wig life. Wash gently with sulfate-free shampoo when product buildup appears, detangle from ends upward, and air-dry on a stand. Store away from sunlight and avoid sleeping with heavy braids in the wig to prevent tangling. If you find yourself repeatedly asking "how do you make your own wig" because of fit issues, consider adding a velvet inner band or adjustable straps to reduce movement.
Troubleshooting common beginner mistakes
Problem: Too-dense hairline — fix by carefully plucking or ventilating fewer knots near the front. Problem: Loose cap fit — add an elastic band or adjust internal reinforcement stitches. Problem: Visible knots — bleach them cautiously or use tinting products. Problem: Shedding — ensure wefts are securely sewn and double-check knotting technique if hand-ventilating. Keeping a troubleshooting checklist helps you refine the build process with each wig you make.
Creative customization ideas
Make your wig unique: incorporate braided bundles, colored wefts for peekaboo highlights, hand-tied bangs, or hair accessories sewn into the cap. You can also integrate micro-beads, clip-in bangs, or removable frontal extensions for versatility. These creative touches answer "how do you make your own wig" in a way that emphasizes personal style rather than simply replicating a factory product.
Cost, time, and realistic expectations
Expect to spend anywhere from a modest amount on synthetic wefts to a higher investment on quality human hair. Hand-tied lace wigs require many hours — sometimes dozens — and are priced accordingly if ordered from professionals. For beginners, a sewn-weft cap can be completed in a few hours; a hand-tied frontal may take several weekend sessions. Track your time and material costs to create a budget-friendly plan for future projects.
Eco-conscious and budget-friendly tips
Reduce waste by reusing mannequin heads, purchasing wholesale wefts, and salvaging lace frontals for practice. Consider synthetic fibers that are recyclable or choose ethically sourced human hair. Also, learn repair skills to refresh older wigs instead of discarding them.
Advanced techniques to learn next
Once you master the basics of "how do you make your own wig", explore advanced ventilating patterns (free-form knots for natural direction), ventilating different hair types (coily, curly, straight), and using silicone bases for secure wear. Learning to ventilate with varied knot sizes, incorporating multi-directional parting, and blending hair textures will dramatically enhance realism.
Checklist before you start
Accurate head measurements and a basic pattern.
Cap type decided (lace, machine, hybrid).
All tools and materials assembled within reach.
A time plan with realistic break intervals to avoid mistakes.
Reference photos for cut, hairline, and parting preferences.
SEO-conscious final notes on "how do you make your own wig"
When optimizing content or documenting your creations online, use consistent phrases like how do you make your own wig, DIY wig making, lace front tutorial, and sew-in weft guide. Include descriptive alt text for any images (e.g., "lace front ventilating process step 1"), use headings to structure the content for search engines, and incorporate user-focused FAQs and step summaries to help readers quickly find answers. These practices increase clarity and help rank content for relevant queries.
Quick reference summary (short checklist)
- Measure, choose cap, and map hairline. - Decide: ventilate or sew wefts. - Secure cap to mannequin, maintain tension. - Build rows/back-to-front, customize hairline density. - Trim, style, and finish with proper products.
Realistic timeline for a beginner
Simple sewn-weft wig: 3–6 hours. Lace-front, basic ventilation: 10–30+ hours depending on experience. Allow additional time for cutting, styling, and finishing. Track practice sessions and you will dramatically lower build time while increasing quality.
Safety and care note
When using chemical treatments (bleach, dyes) always work in a ventilated space, wear gloves, and follow product instructions. For heat styling, maintain appropriate temperature settings and use heat-protectant sprays to prevent damage to both human and heat-resistant synthetic hair.
Final encouragement
Making your own wig is a blend of craft, patience, and experimentation. Start simple, document each project, and gradually adopt advanced techniques. Whether your aim is cost-saving, creative control, or launching a small business, understanding how do you make your own wig equips you to design pieces that are functional, beautiful, and uniquely yours.
FAQ
How long does it take to make a wig for a beginner?
Time varies by method: a sewn-weft wig can take a few hours, while a full hand-ventilated lace wig may take many sessions; expect practice to reduce time significantly.
What is the easiest method to start with?
Starting with a sewn-weft cap or a pre-made cap and sewing in wefts is typically the easiest path for beginners learning how do you make your own wig.
Can I use synthetic hair for DIY wigs?
Yes, synthetic hair is accessible and often more affordable; choose heat-resistant fibers if you want to style with hot tools. Human hair offers the most natural look and longevity but costs more.
How do I make the hairline look natural?
Focus on varying knot density, creating baby hairs, bleaching or tinting knots, and plucking the part sparsely to avoid perfect symmetry.