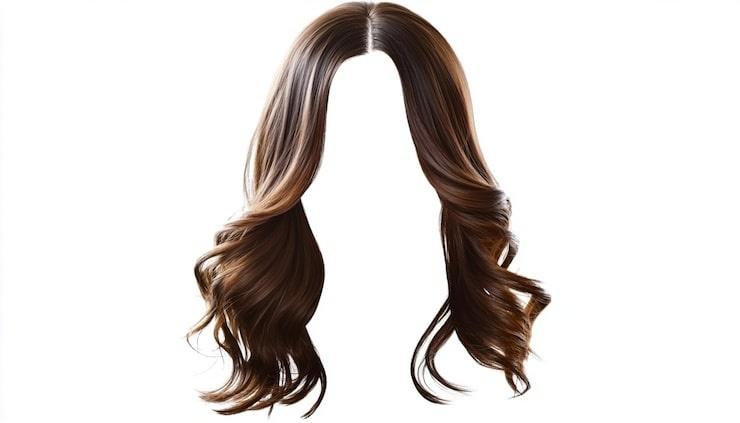
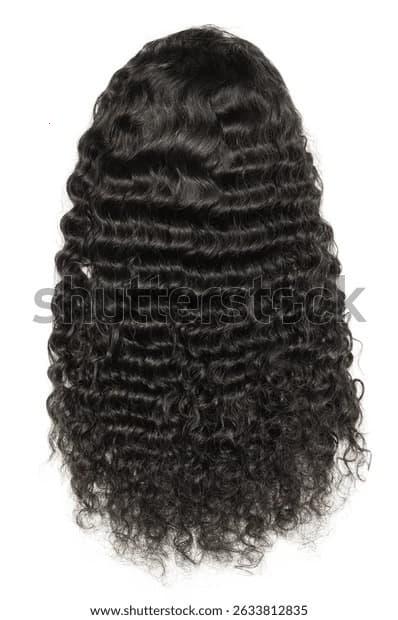
how to revamp a curly wig at home - 9 DIY steps to restore bounce, definition and salon-worthy shine
Refresh, Redefine and Reinvent Your Curls: Practical Home Revival Guide
If you love the look and convenience of curly wigs but feel like the coils are losing their life, this comprehensive guide will walk you through a reliable, salon-inspired routine you can perform at home. We focus on smart, safe, and repeatable techniques to increase curl definition, restore bounce, and bring back that healthy sheen. For search visibility and clarity, the central concept — how to revamp a curly wig at home — is emphasized across this guide so readers searching for at-home revival tips will find actionable steps and product-aware advice.
Why a targeted refresh helps
Curly wigs, whether human hair or synthetic blends, gradually lose definition and luster due to product build-up, environmental contaminants, friction, and improper drying or storage. A regular, gentle routine restores elasticity and softens frizz without compromising the curl pattern. This walkthrough balances moisture, structure, and lightweight hold so your wig looks salon-fresh for longer.
What you'll need before you start
- Wide-tooth comb or detangling brush for gentle separation
- Sulfate-free cleansing formula or wig-friendly shampoo for a mild cleanse
- Deep conditioner or hair mask specially formulated for curly textures
- Leave-in conditioner or curl cream to hydrate and define
- Lightweight curl mousse or gel for long-lasting hold and definition
- Clarifying spray or apple cider rinse (optional) for stubborn residue
- Satin bonnet, scarf, or pillowcase for friction-free drying and storage
- Hair clips or duckbill clips to section hair
- Spray bottle with diluted conditioner or water for refresh misting
- Diffuser attachment (optional) for warmth-based definition on heat-capable wigs
Important safety notes
Always check manufacturer guidance: heat may not be appropriate for all synthetic fibers. Test any new product on a small, inconspicuous section before full application. When handling lace fronts, use care around adhesives and hairlines to avoid loosening knots.
Overview of the nine-step at-home revival routine
- Assess condition and detangle gently.
 Start by placing the wig on a stand. Use your fingers to separate large tangles, then a wide-tooth comb from ends to roots. If knots near the cap are severe, apply a few drops of lightweight oil or leave-in to loosen fibers before combing.
 - Pre-treat problem areas. For visible product build-up, lightly mist a clarifying mixture (equal parts water and mild clarifier) and let sit 3–5 minutes. Avoid over-saturating the base or cap area to protect lace and glue. For human-hair wigs, a diluted apple-cider rinse can remove residues and restore natural sheen.
- Wash with care. Use cool to lukewarm water; hot water can flatten curls. Apply a sulfate-free shampoo sparingly, focusing on mid-lengths and ends. If the cap is exposed, gently clean just the perimeter. Rinse thoroughly with downward motions to avoid frizz.
- Condition deeply—don't skip this. Apply a rich deep conditioner or mask, detangling gently as you work it through. Clip the wig to allow product to sit for 10–20 minutes under a shower cap or microfiber wrap. For added slip, mix a few drops of multifunctional oil into the mask, but avoid heavy oils near the cap.
- Rinse and finish with a leave-in. Use cool water to seal the cuticle and enhance shine. Squeeze out excess water with a microfiber towel; never wring. Apply a leave-in conditioner or curl cream in sections, using a smoothing motion to promote clump formation for defined curls.
- Define using layering techniques. To boost shape, apply a lightweight mousse followed by a low-hold gel where necessary. Use a "rake and scrunch" technique: rake product through from mid-shaft to ends then cup curls and scrunch upward to encourage coils. For synthetic wigs, use products labeled heat-safe and light-hold to keep texture intact.
- Dry strategically. Air-dry on a wig stand for natural bounce and less disturbance. If speeding the process, use a diffuser on low heat with gentle scrunching. Keep the cap facing down to prevent flattening near the crown. For lace-front wigs, avoid direct heat on glued areas.
- Add finishing touches. Once 80–90% dry, break any overly uniform clumps with fingers or a pick at the root for lift. Apply a shine spray or a drop of serum on palms and smooth lightly over outer layers—never apply serum directly to the base. If a trim is needed, remove blunt ends or frayed pieces with sharp shears, or have a stylist finish a small shape up.
- Store and maintain to prolong results. Place your wig on a wig stand or mannequin head and cover with a satin scarf. Use a light refresh mist (water plus leave-in) between wears and clip hair loosely when sleeping or traveling. Avoid heavy styling products that attract dust and accelerate build-up.
Step-by-step deep dive with pro tips
Step 1: Take a moment to inspect under good light. Look for matted zones, dust, or product rings. These are salvageable with patience. Step 2: A targeted pre-treatment can cut wash time and minimize repeated water exposure, which is important for synthetic pieces. Step 3: When you shampoo, focus your lather on the hair shaft and ends—roots often need only a surface touch. Step 4: If curls feel straw-like, choose a humectant-rich mask; for limp curls, use a protein-balanced treatment to rebuild structure. Step 5: For better definition try a layering order: light leave-in, then curl cream, then a whip of mousse; this combo hydrates, forms, and holds without stiffness.
Techniques to revive curl clumps
- Clip-and-set: Use duckbill clips to section and set clumps while hair dries to ensure uniform curl clusters.
- Finger-coil a few problem tendrils: wrap small sections around your finger with a dab of curl gel to recreate ringlets.
- Pin curls for volume: twist small sections into loops and pin to base until dry, then release for springy definition.
When to trim or reshape
Small trims to remove split or frayed ends make a dramatic difference. If the wig feels excessively weighted at certain lengths, a professional style can layer curls for lighter bounce. DIY trims should be conservative—work in small increments and cut when the wig is dry to see the curl spring.
Choosing products for synthetic vs human-hair curls
Human hair accepts most salon-grade conditioners and styling aids; you can use low-heat tools carefully. Synthetic fibers require specially formulated products and often cannot tolerate heat. Always look for product labels that explicitly state compatibility. Lightweight silicones and polymers work well to add shine to human hair but can weigh down synthetic blends if overused.
Common pitfalls and how to avoid them
- Over-washing: Strips natural oils leading to frizz—space washes according to wear frequency.
- Heavy oils near the cap: Cause slippage and stickiness—apply oils only to ends or mid-lengths.
- Rough towel-drying: Creates frizz—use microfiber and gentle squeezing.
- Excessive heat: Melts synthetic fibers or loosens knots—adopt low-heat settings for human-hair wigs and avoid heat for synthetics.
how to revamp a curly wig at home is not a one-size-fits-all process; it’s a mindful combination of cleansing, conditioning, definition, and storage. Over time, repeated gentle routines preserve the original shape and extend the life of your piece.
Quick refresh routine between washes
On non-wash days use a diluted leave-in in a spray bottle to mist and separate curls. Add a small amount of foam to redefine and scrunch upward to encourage bounce. For synthetic wigs, use foam refreshers made for fibers. This quick routine can be performed in under 10 minutes and keeps your wig camera-ready.
Advanced restoration tricks professionals use
- Steam reactivation: For human-hair wigs, controlled steaming reactivates styling products and allows for gentle reshaping. Avoid direct steam on glued lace areas.
- Re-wefting and knot-tightening: For older wigs with loose knots, a professional can secure strands to restore density near the part and hairline.
- Color correction: If the wig looks dull due to toner fading, consult a professional colorist experienced with wigs.
Maintenance schedule for lasting results
Weekly: Light refresh and detangling. Biweekly to monthly: Deep cleanse and conditioning depending on wear frequency. After heavy exposure (salt, chlorine, pollution): Clarify and condition promptly. Always store on a stand and use an occasional silk scarf to limit friction.
Pro tip: Keep a small kit with microfiber towel, leave-in, lightweight gel, and a wide-tooth comb in your styling area to spot-fix on the go.
Budget-friendly product alternatives
If you prefer budget items, look for generic sulfate-free shampoos, glycerin or aloe-based conditioners for humectant properties, and inexpensive mousse formulas with low alcohol content. DIY masks with coconut milk and avocado can provide temporary slip and shine for human hair pieces, but do a strand test first.
Throughout this article the phrase how to revamp a curly wig at home has been used strategically for SEO relevance—this helps search engines recognize the content's focus while delivering value and depth to readers seeking practical DIY guidance.
Checklist before you finish
- Have you detangled from ends to root?
- Did you avoid heavy product near the cap area?
- Is the wig at least mostly dry before manipulating?
- Did you store it on a stand under a satin cover?
Answering yes to these will dramatically increase the odds of a successful revival.
Finishing notes and styling inspiration
After refreshing, play with parting changes, wide-tooth picks at the roots for volume, or small accessories like headbands and pins. Subtle layering and trim work can modernize an older wig without removing the integrity of the curl pattern. Regular light maintenance is the secret: frequent small interventions beat infrequent aggressive ones.
how to revamp a curly wig at home: summary in three lines
- Clean gently, deep condition, and use leave-ins to hydrate.
- Define using layering—leave-in, cream, mousse—then scrunch to encourage clumps.
- Dry smart and store on a stand in satin to preserve shape and reduce friction.
If you adopt these methods, the same piece can remain vibrant and salon-worthy for months or longer depending on frequency of wear and care.
Styling confidence grows with familiarity; experiment, take notes on what products and sequences yield your preferred bounce and definition, and keep a simple kit on hand for quick touch-ups between full refreshes.
FAQ
- How often should I deep-clean a curly wig?
- It depends on wear frequency and product use, but typically every 2–6 weeks is appropriate. Frequent wear with styling products may require more frequent cleansing to avoid build-up.
- Can I use regular human-hair products on synthetic curly wigs?
- Generally no. Synthetic fibers need products formulated for synthetics; regular human-hair products can weigh down synthetics or leave residues that are hard to remove. Always check compatibility.
- Is it okay to trim my wig at home?
- Minor maintenance trims are fine if you’re careful and work in small amounts with sharp shears. For major restyles or reshaping, professional help is recommended to maintain the curl pattern and hairline integrity.
Embrace a regular yet gentle routine and you’ll find your curly wig regains life and shine without costly salon visits. The approach explained here covers both immediate fixes and long-term strategies so you can maintain beautiful curls, whether you’re preparing for a daily look or a special event. Remember that how to revamp a curly wig at home is a blend of knowledge, the right tools, and a little patience—follow these steps and tune them to your specific wig type for the best results.
Related products
Blog
- does hobby lobby sell wigs Learn What Styles, Prices, and Alternatives Are Available Near You
- how do you wear a half wig pro tips and easy steps for a flawless natural blend
- How to Attach a Wig Step by Step Guide for a Secure Natural Look and Long Lasting Hold
- does cher wear a wig Find Out the Truth Behind Chers Iconic Hair and Stylist Secrets
- how to put on costume wig - pro tips and 7 simple steps for a secure natural look
- why do uk barristers wear wigs - the surprising history, symbolism and modern debate explained
- did steven van zandt wear a wig in the sopranos answered with on set evidence and hairstyle facts
- how long will a synthetic wig last Discover realistic lifespan expectations and top care tips to extend your synthetic wig life