how to properly put a wig on step-by-step guide for beginners to secure, style and maintain lace front and synthetic wigs

Mastering the basics: a clear introduction to how to properly put a wig on
Learning the essentials of wig application is empowering: the right method gives a natural hairline, comfortable wear, and a secure fit that lets you live confidently. This comprehensive, step-by-step guide unpacks professional techniques for lace front wigs and synthetic units, explains tools and products, and covers everyday maintenance routines so you can achieve a salon-quality finish at home. Throughout this guide you'll find practical tips, troubleshooting strategies, and styling notes designed for beginners and those refining their routine. The focus is how to properly put a wig on in ways that maximize comfort, durability, and realism.
Why technique matters
Applying a wig correctly does more than change your look: it protects your natural hair and scalp, reduces wig slippage, and prolongs the life of the wig. Whether you prefer lace front, full lace, or lace-less synthetic caps, consistent method and product choice determine whether the result looks blended or obvious. This guide emphasizes safe adhesive use, proper cap fitting, and styling that complements your face shape while preserving the unit.
Essential tools and products
- Wig cap (nylon or mesh to flatten natural hair);
- Wig brush or wide-tooth comb;
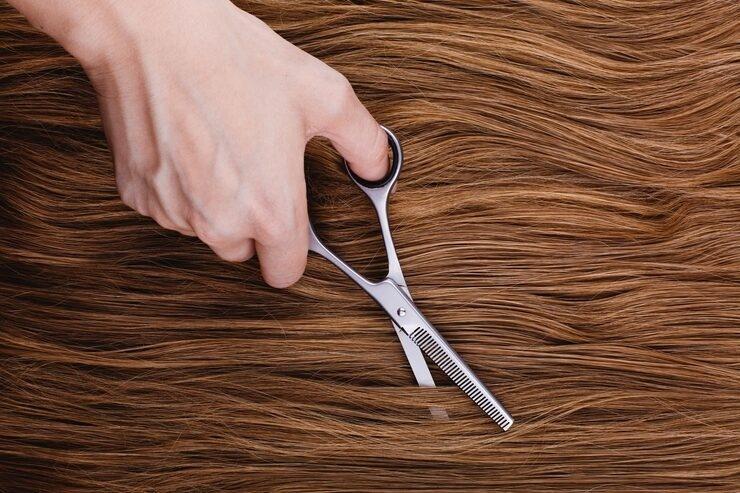
- Scissors for trimming lace (if using lace front);
- Wig clips or grip tape for extra hold;
- Adhesives: medical-grade wig glue, wig tape, or glue-free wig grips;
- Alcohol or adhesive remover for cleansing residue;
- Edge control and small toothbrush for baby hairs;
- Heat protectant and low-heat styling tools for human hair pieces; avoid heat on many synthetic wigs unless specified heat-resistant;
- Styling products designed for wigs (silicone-free serums for synthetic units, lightweight oils for human hair).
Preparation: what to do before the wig goes on
Successful application starts with preparation. Follow these steps in order to create a smooth foundation:
- Secure natural hair: Braid or cornrow flat to the scalp, or wrap hair in a low bun. The goal is minimal bulk under the wig cap.
- Put on a wig cap: Choose nylon for a smooth surface or mesh for breathability. Ensure the cap covers all hair and sits just above the eyebrows for a natural hairline placement.
- Clean the hairline and forehead: Use an alcohol wipe to remove oils, moisturizer, or makeup. This helps adhesives bond and reduces slippage.
- Trim lace carefully if using a lace front: Cut the excess lace along the natural hairline using small, precise scissors—leave a tiny margin to avoid cutting into the hairline of the wig itself.
Pro tip
When trimming lace, work in small sections and cut in a zigzag pattern to mimic natural hair growth; avoid a straight uniform cut which can look artificial.
Step-by-step application: lace front and synthetic wig methods
Below are two parallel, clear procedures—one focused on lace front units using adhesive and one for synthetic caps that rely on combs, elastic, or grip bands. Choose the path that matches your wig type.
Method A — lace front (adhesive method)
- Position the wig: Hold the wig by the nape, tilt your head forward slightly, and slide the front of the wig onto your forehead. Align the lace with your natural hairline—ensure symmetry by checking both temples.
- Mark placement: With fingers, press the lace where you want it to sit and make small marks with washable eyeliner if you need a guide.
- Apply adhesive: Use a thin layer of medical-grade adhesive or wig tape along the cleaned forehead area. If using liquid glue, allow it to become tacky (usually 30-60 seconds). For tape, cut strips to fit and press firmly.
- Secure the lace: Carefully lay the lace onto the adhesive starting from the center hairline and smoothing toward the temples. Use a small pressing tool or the back of a makeup brush to gently press the lace into the glue to seal. Avoid stretching the lace when laying it down.
- Blend and conceal: Use foundation or concealer that matches your skin tone to lightly tint the lace if necessary. Create baby hairs or gently backcomb the front to blend the transition.
- Let the adhesive set: Wait a few minutes before styling to ensure the bond is secure. If needed, use a blow dryer on cool setting for faster curing.
Method B — synthetic and non-adhesive methods
- Choose a secure cap: Many synthetic wigs come with adjustable straps, combs, and elastic bands. Adjust the straps to a comfortable snug fit while the wig is on your head.
- Clip or pin for extra hold: Use wig clips or small bobby pins at the nape and sides if extra security is needed. Insert pins through the weft and into the wig cap, not through the lace.
- Use a wig grip for daily wear: A velvet wig band worn under the wig provides friction and prevents slipping without adhesives. Position the band at the hairline to create a secure anchor.
- Style gently: Synthetic fibers require less heat; many modern synthetic wigs are heat-friendly at low temperatures but always check the manufacturer's guidelines and use low heat when styling.
Safety and comfort considerations
Protecting your natural hair and scalp is paramount. Rotate adhesives and remove them properly with adhesive remover to avoid irritation. Never sleep in a glued wig unless the product label explicitly states it's safe. For long-term wear, consider periodic breaks and deep scalp cleansing to maintain scalp health.

Advanced tips for a natural hairline and seamless blend
- Create baby hairs: Trim a few strands of the wig lace front to simulate baby hairs and use edge control to style them; this technique softens the hairline.
- Pluck sparingly: For a less dense hairline, pluck a few hairs along the part and perimeter, but proceed slowly to avoid over-thinning.
- Tint the lace: Lightly apply a lace tint or use a thin layer of foundation to match your scalp tone for an invisible lace effect.
- Customize density: For a more natural look, customize the density by ventilating (re-knotting) sparse areas or thinning with shears for overly dense units.
Styling advice for lace front vs synthetic wigs
Lace front (human hair or high-quality synthetic): These units offer the most versatility—heat styling, chemical treatments (if human hair), and updos are possible with proper care. Use lightweight products to avoid weighing hair down and a heat protectant for thermal styling.
Synthetic: Maintain shape by using products designed for synthetic fibers, avoid high heat unless the wig is heat-resistant, and store on a wig stand to preserve style and reduce tangling.
Daily care and long-term maintenance
Longevity depends on routine care. Implement these steps to ensure your investment lasts:
- Gentle washing: Use sulfate-free, wig-formulated shampoo and cool water. Submerge the wig, gently swirl, rinse, and apply a wig conditioner, avoiding tangling the cap. Do not rub vigorously.
- Detangling: Use a wide-tooth comb starting at the ends and working upward. For curly units, finger-comb or use a detangling spray designed for wigs.
- Proper drying: Pat dry with a towel and place on a wig stand to air dry. Avoid high heat from blow dryers unless the unit supports heat styling.
- Storage: Store on a wig head or in a breathable bag. Keep away from direct sunlight and dust to prevent fading and fiber breakdown.
- Periodic professional servicing: For human hair wigs, occasional salon refresh (deep conditioning, reshaping) extends life and maintains realism.
Troubleshooting common problems
Even with care, issues may occur. Here are quick solutions:
- Slippage: Tighten straps, add wig grips, or switch to a stronger adhesive method.
- Visible lace: Tint the lace, re-position the wig slightly forward, or create baby hairs to break the straight edge.
- Itching or irritation: Clean adhesive residue thoroughly and test a different adhesive formulated for sensitive skin; consult a dermatologist if irritation persists.
- Tangling (especially at the nape): Reduce friction by sleeping on a silk pillowcase and brushing before bed; refresh with a detangling spray.
Checklist: step-by-step condensed routine
Use this quick checklist before leaving the house: (1) secure natural hair and cap, (2) clean hairline, (3) align lace and apply adhesive or fit straps, (4) press lace and blend hairline, (5) style and set, (6) final security check with mirrors. Practicing these steps makes the process faster and more reliable over time.
Choosing the right wig and fit for everyday life
Select a cap construction that matches your lifestyle. Lace fronts are ideal for realistic frontals and styling flexibility. Full lace allows intricate updos. Synthetic is budget-friendly and low-maintenance for quick daily wear. Pay attention to cap size—measure your head around the perimeter slightly above the ears to ensure a correct fit. Adjustable straps help fine-tune the tension.
When purchasing, examine the hairline and density at the front: pre-plucked fronts are easier for beginners. For those concerned about adhesives, many modern units come with silicone-lined caps or built-in grips that remove the need for glue while maintaining a natural look.
Quick styling ideas after proper application
- Soft waves: Use a wide-barrel curling iron on human hair units or heat-friendly synthetics at low temperature.
- Sleek low bun: Smooth edges with gel and twist hair into a secure bun at the nape, securing with pins through the weft.
- Half-up styles: Leave framing pieces out for a lived-in effect while keeping hair secure at the crown.
What to avoid
Avoid excessive heat on non-heat-friendly synthetics, sleeping in adhesive-bonded wigs unless approved, and over-plucking or chemically processing wigs without professional advice. These actions shorten a wig's usable life.
Final notes and personal tips
Experiment with a practice session at home before wearing a new technique out. Take photos from multiple angles to evaluate symmetry and hairline blending. Consider keeping a small kit with adhesive, remover, bobby pins, edge brush, and a mirror for on-the-go touch-ups. Transition slowly between adhesive types until you find one that balances hold and scalp comfort.
Remember that natural results come from subtle customization: selective plucking, tinting lace, and creating baby hairs all contribute to realism without drastic alterations.
FAQ
How long does it take to get comfortable with the application process?
Most beginners feel comfortable after 3-5 practice sessions; complexity depends on lace work and whether you use adhesives. Start slow and refine one step at a time.
Can I use regular hair glue for my lace front?
Use only adhesives formulated for wig application—medical-grade or products specifically labeled for lace wigs. Regular craft or hair glue can irritate the scalp and damage the lace.
How often should I wash my wig?
Wash based on wear: light daily wear every 10-14 wears; more often if you use heavy styling products or sweat frequently. Synthetic units generally require less frequent washing than human hair.
With this comprehensive roadmap, your journey to mastering how to properly put a wig on will be smoother and more successful. Practice, care, and the right tools are the three pillars that turn a good wig routine into a great one.
Related products
Blog
- Expert Guide to Lace Front Wigs with Styling Tips, Care Advice and Top Picks
- why are human hair wigs more expensive Discover 8 Proven Reasons Behind the Price Tag
- how to color synthetic wig safely step by step guide to vibrant results without damaging fibers
- what is a 360 lace front wig and how this full perimeter lace delivers a natural hairline and styling freedom
- From court fashion to legal ritual — why did the english wear wigs and how powder, prestige and politics shaped the trend
- why do orthodox jewish women wear wigs — history, religious reasons and modern choices explained
- is dawn olivieri wearing a wig in yellowstone - costume secrets and on-set hair styling explained
- does hannity wear a wig Investigating Sean Hannity's Hairline with Expert Analysis and a Photo Timeline