how to make a cheap wig look good cosplay 12 Easy Pro Tips for Natural Long-Lasting Results on a Budget

How to make a cheap wig look good cosplay: Practical, budget-friendly styling strategies for believable results
If you're asking how to make a cheap wig look good cosplay without breaking the bank, you're in the right place. This extensive guide covers professional yet inexpensive techniques to upgrade low-cost wigs into convincing, durable cosplay pieces. Each section is structured for search engines and readers alike, with clear headings, actionable steps, tool lists, and troubleshooting tips to make your wig look natural, last longer, and match your character closely.
Why low-cost wigs often look cheap (and how to fix it)
Low-priced wigs commonly reveal telltale signs: shiny synthetic fibers, unnatural volume, blunt cut lines, visible weft lines, poor hairline construction, and a stiff or limp silhouette. The good news is that most of these flaws are fixable with targeted, inexpensive techniques. Below you'll find a layered approach: preparation, shaping, hairline work, texture and heat styling, color blending, attachment, and maintenance. Each technique is designed to be replicable by beginners and scalable for experienced cosplayers.
Quick overview: 12 Budget-friendly upgrade strategies
- Clean and condition the fibers to remove factory shine.
- Reshape and trim to mimic natural layers and avoid blunt blockiness.
- Create a realistic hairline using lace, baby hairs, or plucked wefts.
- Thin and texturize with thinning shears and razors for movement.
- Blend colors with fabric dye pens, markers, or heat-safe tinting.
- Train the fibers using low-heat styling and steam for synthetic wigs.
- Secure and conceal the cap and wefts with proper pins, glue dots, and inner caps.
- Style for character using affordable accessories (clips, wire, foam).
- Use matte products like dry shampoo, matte sprays, or baby powder to reduce shine.
- Reinforce parting with concealer powder or wig-specific makeup.
- Store and protect the wig to maintain shape and reduce tangles.
- Practice finishing touches like flyaway control and edge seaming for a custom look.
1. Clean and de-gloss: the foundation
Shiny, plasticky fibers instantly signal a cheap wig. Washing and conditioning a synthetic wig removes excess factory finishing and softens the fiber surface. Use a gentle sulfate-free shampoo or a wig-specific cleanser; avoid hot water. Add a small amount of fabric softener or dedicated silicone-based wig conditioner to restore suppleness. After washing, gently blot with a towel and let the wig air-dry on a wig stand or mannequin head to preserve the cap structure. For heat-resistant synthetics, a light mist of leave-in conditioner keeps strands manageable while you style.
2. De-shine with simple household items
To reduce unwanted gloss, sprinkle a very light dusting of baby powder or use dry shampoo on the wig, then brush through. Work in small sections and remove excess powder with a soft brush. Another trick is diluted white vinegar in the final rinse (for synthetic-friendly wigs) to take off residue and dull the shine slightly. Always test a tiny, hidden area first.
3. Recutting and shaping: the most visible upgrade
Blunt factory cuts ruin realism. Invest in a pair of thinning shears and a fine-tooth comb. Section the wig and work gradually: point-cut the ends to avoid heavy, straight edges, and use thinning shears around layers and bangs to create feathered texture. A razor comb can help create wisps and movement, but be careful—work slowly to avoid removing too much. For long wigs, add face-framing layers that mimic natural fall and reduce the "wig cap helmet" effect.
4. Make the hairline believable
One of the fastest ways to transform a wig is to soften the hairline. If your wig has a lace front, remove excess lace carefully and pluck a few hairs to create a staggered, natural density. For non-lace wigs, create baby hairs by trimming small sections around the front and using a light gel or thread to lay them down. You can also sew a strip of lace or sheer material to the front and vent hairs into it for a faux-lace hairline if you're comfortable with light sewing. Conceal the wig cap edge with a thin layer of skin-tone wig glue or liquid latex, then powder to match your complexion.
5. Thinning and texturizing for movement
Cheap wigs often have thick, clumped bundles. Use thinning shears deep into the wefts and between rows to create separation. Additionally, use a light spray of sea-salt spray formulated for synthetics to add grit and texture. For characters with specific textures (curly, wavy, sleek), use the appropriate tool: curling wand on heat-safe fibers, steam for setting waves, or a flat iron on low settings for smoothing. Always check the fiber's heat tolerance.
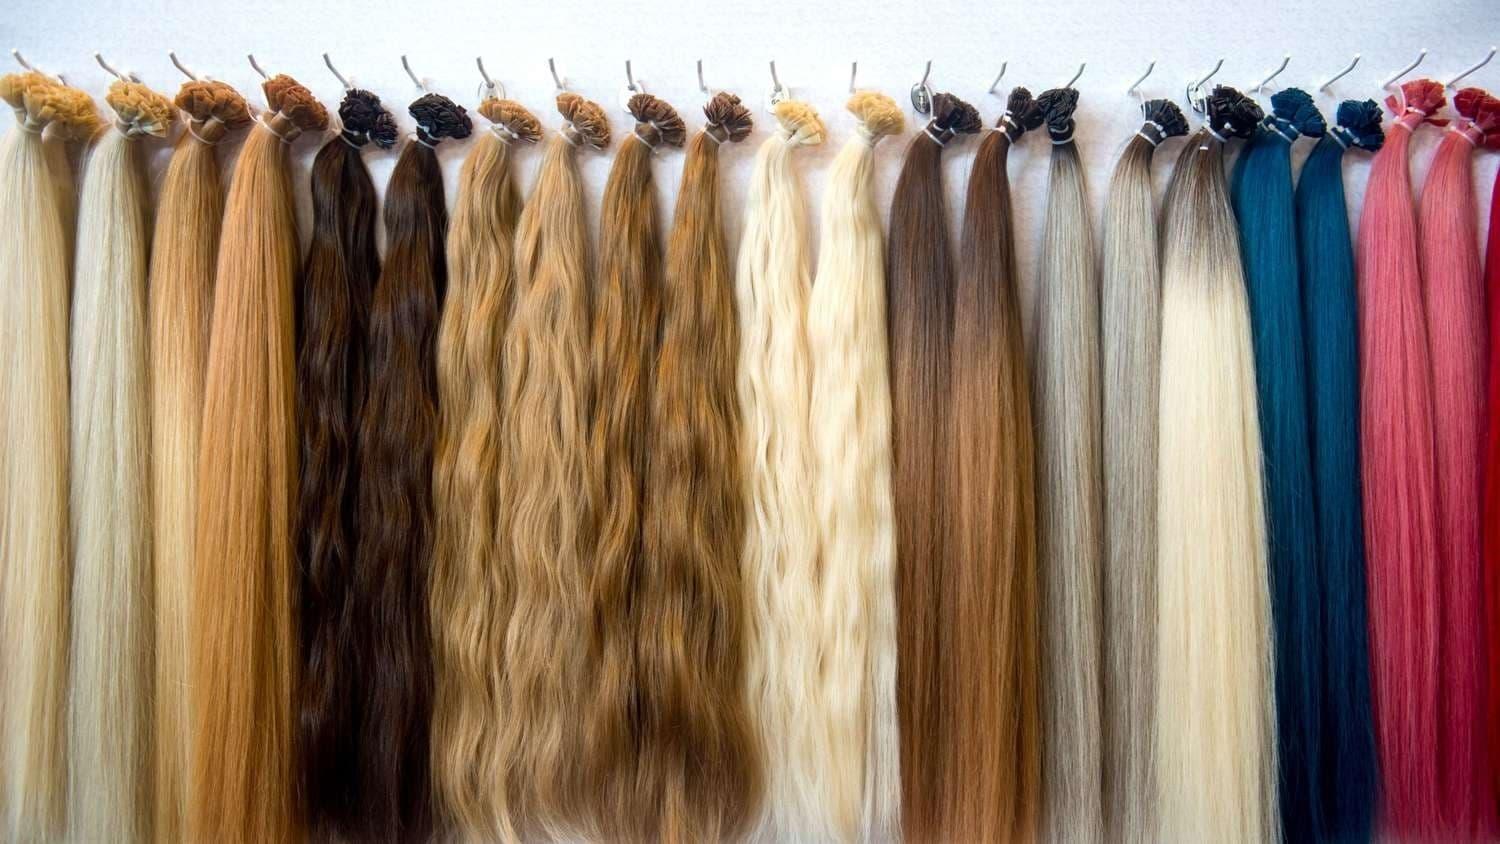
6. Color blending and naturalization
Color is crucial for cosplay accuracy. Cheap wigs sometimes have a uniform, fake-looking shade. Use alcohol-based markers, pastel chalks, diluted acrylics, or fabric dye pens to add highlights, lowlights, and root shadowing. Work in layers: start with subtle root darkening to mimic natural growth, then add streaks or tips. For a fast trick, a soft eyeshadow or contour powder applied to the part line and roots can create depth and disguise an obvious single-tone wig. If dyeing synthetic fibers, ensure they are heat-resistant or use suitable synthetic dyes and follow safety instructions.
7. Styling heat and training fibers
Some synthetic wigs are heat-friendly up to a specific temperature. Read the label. Use a low-temp flat iron, curling wand, or steam to set shape and taming flyaways. "Training" a wig means styling and letting it cool in the desired shape (on a wig block) repeatedly so the fiber holds the form. For non-heat fibers, steam styling—gently steaming and shaping with hands or pins—can be effective. Use flexible hold sprays to maintain the form without crunchy stiffness.
8. Securing, fitting, and comfort
A well-fitted cap changes the profile. Use a wig cap to tuck your hair and smooth edges. Cushioning strips or wig grip bands help avoid slippage and reduce visible cap contours. For cosplay with intense movement, use wig tape, wig glue dots, or liquid adhesive to anchor the front and sides. Place U-pins or wig clips at strategic anchor points, especially behind the ears and at the nape. Conceal the band with styled hair or headgear to keep the silhouette natural.
9. Concealing wefts and cap lines
Visible wefts and gaps are giveaways. To hide them, add interior liner materials—thin elastic or stretch lace—sewn across the cap to smooth lines. On the exterior, strategically place bangs or layered pieces to mask bulky rows. Use tiny stitches to bring forward the top layer of hair closer to the hairline, reducing the appearance of an obvious seam. A dab of fiber-safe glue along the part and then powdering helps reduce glare on the part line.
10. Accessories and structural modifications
Sometimes accessories save the day: character headpieces, ribbons, hats, or clips can hide weak points while adding authenticity. For structured styles (ponytails, gravity-defying spikes), create an internal armature using wire, craft foam, or braid-in wefts to support shape. Sew in lightweight stabilizers or use hair filler (doll hair, craft yarn) to bulk stylized forms cheaply.
11. Finishing touches that sell realism
Small details make big differences: create micro baby-hairs with thinning techniques, add subtle shine reduction near the face, and secure stray stands with clear thread or micro-stitches. Use matte setting sprays and light touch-ups with foundation or powder at part lines. If your character has oil-sheen or unique texture, reproduce it selectively—avoid overdoing any one product to maintain natural movement.
12. Care, storage, and maintenance
Proper maintenance extends the life of a cheap wig. Store on a stand or stuffed with tissue to retain shape. Detangle with a wide-tooth comb from tips to roots. Avoid excessive heat and long exposure to sunlight which can fade colors. For cosplays that last several days, pack a small emergency kit: extra bobby pins, a travel spray, clear elastics, and a spare strip of lace or glue for quick repairs.
Tools and affordable supplies checklist
- Wide-tooth comb, fine-tooth comb, and padding brush
- Thinning shears and small haircutting scissors
- Needle and thread for light sewing, glue gun (low-temp), and wig glue (optional)
- Matte dry shampoo, sea-salt spray for texture
- Fabric dye pens, alcohol markers, or pastel chalks for color work
- Wig stand or mannequin head, wig cap, and wig tape
- Small flat iron or steamer for heat-friendly synthetics
Quick step-by-step example: turning a $20 wig into a photographed-ready piece
- Wash and condition to remove sheen.
- Air-dry on a wig stand and mist with leave-in conditioner.
- Section, then thin and point-cut edges; create face-framing layers.
- Darken roots with a marker or shadow powder; apply light highlights with pastel chalk.
- Create baby hairs and shape the hairline; secure front edge with tape for a day event.
- Style with low-heat tools or steam; set with flexible hairspray.
- Fit and secure using a wig grip and discreet pins; add character accessories.
Common mistakes to avoid
Over-thinning, heavy use of glue, excessive heat on non-resistant fibers, and uneven color application are frequent errors. Always practice on a spare wig or a small hidden area before altering the main wig significantly. Work slowly and take photos during stages to compare progress and ensure symmetry.
Troubleshooting
Shine still an issue? Try a matte powder and re-angle lighting for photography. Cap showing through? Create a deeper part with added hair or sew a narrow strip of lace. Wig won't hold shape? Use internal support or wire armature and retrain fibers with heat or steam where allowed.
Advanced modifications for ambitious cosplayers
For those comfortable with sewing and creative construction: ventilate new hairs into a lace strip, re-weft expensive wefts into better patterns, or combine multiple cheap wigs for layered, multi-tone results. Swap out cheap caps for higher-quality stretch lace caps and replant important sections to achieve a custom density and hairline that reads well in photos.
Styling by character type
Tailor your approach: anime characters often need sharp, exaggerated spikes supported by internal armature and heavy product; realistic characters benefit from softened hairlines and natural layering; historical or fantasy styles may use padding and braids for volume and silhouette. Always reference multiple images and break down the style into base shape, texture, and surface detail.
Photography and lighting tips to enhance the illusion
Camera lighting can either betray or flatter a wig. Use soft, diffused light to minimize shine and highlight texture. Position your part and hairline away from harsh backlighting, or use fill light to eliminate shiny hotspots. A simple reflector can help balance shadow and make the wig appear more three-dimensional and natural on camera.
Where to buy cheap wigs worth upgrading
Look for sellers with clear fiber specs and return policies. Heat-safe synthetic, lace-front, and high-denier wefts are preferable even at low prices. Read reviews and zoom in on product photos to gauge density and cap construction. Buying two on sale and blending them often yields better results than one very cheap full-density wig.
Cost vs. result: smart investment choices
Instead of buying an expensive wig outright, invest time in upgrading a budget wig: a $20 wig + $20 in tools and materials + 2–4 hours of work can rival a store-bought $80 wig in appearance and custom fit. Prioritize tools that give the largest improvement: thinning shears, a wig stand, and a decent set of styling products.
Checklist before you wear it for a convention or photoshoot
Fit test, secure edges, quick touch-up kit, spare pins, mini brush, travel spray, and safety pins for repairs. Re-hearse attachment steps so you can put the wig on efficiently under time pressure.
Summary: Practical habits that consistently improve outcomes
Focus on reducing shine, improving the hairline, adding texture, and matching color depth. Small changes compound. Frequently, the difference between "obviously fake" and "convincing" is in the details: a softened hairline, a realistic part, and controlled shine. When deciding where to spend time or money, prioritize changes visible in photos and up close—front hairline, part line, and natural movement.
Final notes on SEO and the keyword
Throughout this guide the phrase how to make a cheap wig look good cosplay has been highlighted because it's a practical search term that many cosplayers use when seeking transformations on a budget. For best results when publishing, pair this content with high-quality images showing each step, include alt text for images using the keyword, and add a short meta description (not included here) emphasizing budget tips, 12 pro strategies, and natural results.
If you're short on time: a 10-minute quick fix
Wash/dry the wig in mild water the night before; the next day, add a matte spray, thin the bangs slightly, create a small group of baby hairs at the front, and secure with a wig grip. Add a headpiece or bangs to disguise the cap edge if needed.
FAQ
A: Most can be improved significantly, especially synthetic lace-front and heat-friendly units. Extremely low-quality caps may require cap replacement for top-tier results.
Q: Is dyeing synthetic wigs safe?
A: Only certain heat-resistant synthetics accept dyes; use synthetic-specific dyes or fabric markers and test on a hidden area first.
Q: How do I prevent a wig from slipping during intense movement?
A: Use a tight wig cap, wig grip band, strategic pins, and adhesive at the front; practice attachment before the event.
Related products
Blog
- can you wash synthetic wigs with regular shampoo - Expert step-by-step care tips to keep them soft and tangle-free
- does kapil sharma wear wig Uncovering the Truth with Photos, Stylist Insights and Fan Reactions
- can i relax my wig - safe techniques, common mistakes and essential aftercare for human and synthetic wigs
- Step-by-Step DIY Tips on how to color a synthetic wig for natural looking results
- how to thin a wig - expert step by step thinning tips for natural volume
- Find the best wig shop near me with expert tips, style guides and honest local reviews
- Gentle tips on how to wash a wig with real hair for long-lasting softness and shine
- Practical guide, how often to wash human hair wig and simple care steps for silky, long-lasting results