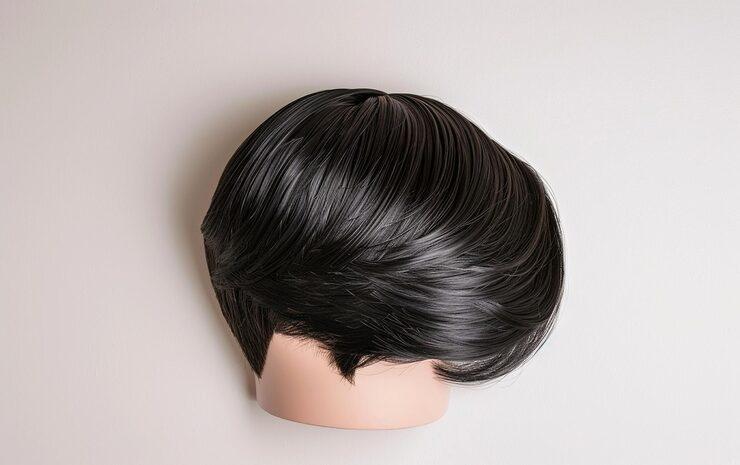
how to fit hair under a wig step by step for a secure natural look even beginners can master

Mastering a Natural Fit: Practical Guide to how to fit hair under a wig
Getting a wig to look natural begins long before styling: it starts with how you prepare and position your own hair. For anyone searching for clear instructions on how to fit hair under a wig, this comprehensive guide covers everything from basic prep to advanced tips that even novices can follow. The guidance below balances simplicity and technical detail to help you achieve a secure, comfortable, and realistic hairline every time.
Why a proper fit matters
When you learn how to fit hair under a wig correctly, you gain four benefits: a natural silhouette, improved comfort, longer wig life, and fewer adjustments during wear. A wig that sits well prevents gaps that expose your own hair, reduces friction and tugging that cause breakage, and helps glue or grips hold effectively. This guide treats fit as both an aesthetic and protective practice.
Essential supplies and tools
- Breathable wig caps: nylon, mesh, or silicone-lined depending on your preference.
- Edge control and gel: for smoothing flyaways and sealing edges.
- Bobby pins and wig clips: to secure braids or pinned hair under the cap.
- Elastic wig band or wig grip: to stabilize the wig without adhesive.
- Adhesive / tape (optional): for lace front wigs when you need extra hold.
- Rat-tail comb and wide-tooth comb: for neat parting and detangling.
- Heat tools and rollers (optional): to shape natural hair before applying cap if heat-safe.
Understand your hair type and choose a method
Different base hair lengths and textures demand distinct approaches. Below are friendly, reliable methods grouped by common hair situations so you can pick the most suitable route:
1. Short hair or pixie cuts
If your hair is short (below ear-length), you can smooth it with a light gel or pomade and put on a wig cap. For extra flatness, use two caps: a nylon cap first, then a mesh cap to hold hair and prevent slippage. This is one of the simplest cases of how to fit hair under a wig.
2. Medium to long straight hair
Flat-braiding or twisting the hair into small, flat plaits along the scalp is ideal. Alternatively, create a flat bun and pin it firmly. The goal is a low, even base so the wig sits flush to the scalp. Use bobby pins to keep any thicker sections from protruding.
3. Curly, coily, or highly textured hair
For textured hair, braids or flat twists are the most protective and effective. You can also stretch hair first via banding or blow-drying on low heat (if your hair is relaxed or heat-safe). For very thick hair consider dividing into panels and making flat cornrows; then use a snug, breathable cap to compress the style.
4. Locs or very long heavy hair
For locs, heavy braids, or lengthy hair, use a low-profile braid or tuck technique: gather hair low at the nape, wrap into a compact coil, then flatten with a wide elastic band and a sturdy cap. In some cases, a silicone wig cap placed over a mesh cap creates a smoother surface while protecting the locs.
Step-by-step routine to fit hair under a wig (detailed)
- Wash and condition: Clean hair creates a manageable base. If you prefer, do this the night before so hair is fully dry before styling.
- Detangle gently: Use a wide-tooth comb to remove knots. Moisturize leave-in as needed but avoid heavy oils that may make caps slip.
- Decide on a method: Choose among smoothing (for short hair), flat braids, flat twists, French cornrows, or a tucked bun for long hair.
- Create a smooth foundation: Apply a small amount of edge control or styling gel to the hairline and parting areas. This step helps when placing lace fronts or creating a seamless hairline.
- Make flat braids or twists: Braid or twist hair close to the scalp, working in rows that conform to the wig’s natural parting if you plan to show a part.
- Secure ends: Use elastic bands or pins to anchor braid ends into a low, flat coil against the head.
- Cap layering: Put on a thin nylon cap first to flatten hair and secure strands; then a mesh cap can go on top for extra hold. For more slippage control, choose a silicone-lined cap or add a wig grip band.
- Check for lumps: Run your hands over the surface to feel for uneven spots. Smooth any visible bulges by repositioning pins or tightening the cap.
- Fine-tune the hairline: If you have baby hairs, lay them down with gel and allow to set. For lace fronts, align the lace carefully to the natural hairline after cap placement.
- Put on the wig: Tilt forward to place the front then slide the back into position. Adjust ear tabs and align the center part. Fasten adjustable straps or clips inside the wig.
- Secure: Use a non-slip band, wig tape, or adhesive if necessary—make sure skin is clean and product instructions are followed.
- Blend and style: Trim any lace, blend the wig edges with your baby hairs or makeup if needed, and style with heat tools carefully according to the wig fiber type.
Common problems and quick fixes
Even with a careful method, issues can arise. Below are quick troubleshooting tips for the most frequent concerns:
- Bulges under the cap: Reposition braids, add an extra cap layer or tuck excess hair into the coil more tightly.
- Cap slipping:
 Use a silicone wig cap or inner wig grip band; secure bobby pins to clips sewn into the wig.
 - Visible lace or unnatural hairline: Pluck a sparse amount of hairs along the lace line, melt lace carefully, or apply a thin layer of foundation to the lace for color match.
- Itchy scalp: Choose breathable caps and rotate wig styles to allow scalp air time. Apply scalp-friendly powder or anti-itch treatments as needed.
Tips to make the process beginner-friendly
When teaching newcomers how to fit hair under a wig, emphasize these approachable tricks: practice makes progress, take photos at each stage to troubleshoot, use stretchy wig grips for initial experimentation, and start with ready-to-wear wigs that have secure combs and adjustable straps. For first timers, a full-cap style that doesn’t require perfect lace alignment will boost confidence.
Protecting natural hair while wearing wigs
Wigs can be a protective style if done correctly. Always: cleanse and condition your hair regularly, avoid super-tight braiding that tugs at the edges, and give your scalp rest days between continuous wig wear. Use satin liners or silk scarves at night to reduce friction and preserve the flat base you worked to create.
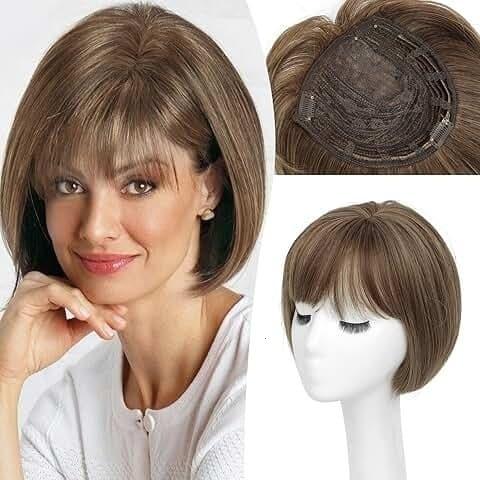
How to choose a cap and wig type for easier fitting
A few selections make the learning curve gentler. Look for wigs with adjustable straps and inner combs. Lace front wigs give the most natural hairline but require more precision; glueless full caps or machine-tied wigs are easier to install for beginners learning how to fit hair under a wig.
Advanced tricks for an ultra-realistic look
Once you’ve mastered basic steps, try these pro moves: customize the hairline by ventilating lace to soften density, use concealer or scalp-colored powder along the part, trim the wig’s perimeter to mirror your bone structure, and practice creating micro-baby hairs for the most convincing frame. Heat-style with care; human hair wigs respond well to curling or flat-ironing for a personalized finish.
Maintenance checklist

- Regularly wash the wig as per manufacturer instructions.
- Refresh the cap layers after each several wears; replace caps once they stretch out.
- Inspect internal combs and straps; mend or replace if worn.
- Avoid sleeping in heavy lace fronts unless you use a silk bonnet for protection.
Product and material recommendations
Not all caps and adhesives are equal. For long-lasting hold without frequent gluing, invest in a good quality silicone-lined wig cap or an elastic grip band that matches your head circumference. For lace adhesion, use medical-grade adhesives and practice removal with proper solvents to avoid damaging your skin or wig lace. Lightweight breathable caps are especially recommended for hot climates.
Checklist: quick reference for each wear
- Clean and moisturize scalp (non-oily).
- Flat-braid/bun/tuck hair with bobby pins secured.
- Put on nylon cap, then mesh or silicone cap if needed.
- Place wig, align part and hairline, and secure straps/clips.
- Apply final edge control and blend lace or hairline with makeup if desired.
Why practice makes perfect
At first, the steps for how to fit hair under a wig may feel like many small tasks. With repetition you’ll develop rhythm: faster braiding, cleaner cap placement, and more confident lace alignment. Keep notes on what worked for your hair density and wig type so you can replicate success.
Quick recap: a simplified routine for busy mornings
For a fast yet secure result: smooth hair, put on a single snug cap, slip on the wig, adjust straps, and add a wig grip band. This streamlined process reduces time while still respecting the fundamentals of a flat, protected base.
Safety and scalp health reminders
Avoid prolonged tight tension around edges, take breaks from adhesives to let skin breathe, and consult a dermatologist if you notice persistent irritation. Healthy scalp = better long-term results when learning how to fit hair under a wig.
Final encouragement
Whether you’re experimenting for the first time or refining a signature look, mastering the method of fitting hair under a wig is entirely attainable. Small, consistent adjustments yield the most natural outcome: a flat base, a well-set cap, and a wig that behaves like real hair around your face.
Common styling scenarios and quick solutions
- Sweaty weather: use breathable caps and lightweight wigs; reapply a grip band instead of adhesive.
- Windy conditions: secure under-ear tabs and use a light adhesive if you’ll be outdoors for extended periods.
- Physical activity: choose a snug cap and a wig with multiple combs to minimize movement.
By integrating these steps and tips into your routine, you’ll build confidence and skill in how to fit hair under a wig, producing looks that are both secure and convincingly natural.
FAQ
Q: How tight should the cap be?
A: Snug but not painful — it should keep hair flat and prevent sliding without constricting blood flow. You want to avoid marks or headaches; adjustable straps and wig grips help achieve the right tension.
Q: Can I sleep in my wig?
A: It’s better to remove wigs before sleep to reduce tension and friction. If you must sleep in one, use a silk scarf or bonnet and a low-tension cap to protect both the wig and your natural hair.
Q: How can I make the hairline look more natural?
A: Use minimal plucking on lace fronts, create subtle baby hairs with a toothbrush and gel, and blend the lace edge using powder or a matching concealer. Practice small adjustments rather than heavy modifications for the most believable result.
If you remember one thing from this guide, let it be that the success of a wig look is built on preparation. Learning how to fit hair under a wig effectively is about protection, patience, and a few repeatable steps that yield consistent, realistic outcomes—perfect for beginners and seasoned wearers alike.
Related products
Blog
- where can i get a wig near me - discover trusted local wig shops, salons and online sellers today
- how to glue on a wig - expert step by step guide for a secure, natural hold without damage
- can you wash synthetic wigs with regular shampoo - Expert step-by-step care tips to keep them soft and tangle-free
- 7 Pro Tips how to brush a wig without ruining it and keep it tangle-free and shiny
- How to Choose the Best Wig Human Hair for a Natural Look and Long Lasting Wear
- Ultimate Guide to a list wigs - Top Styles, Care Tips and Best Places to Buy 2025
- why doesn't george clooney just wear a wig - separating rumor from reality and what his hair choices reveal about Hollywood
- Discover where do wigs come from and the surprising journey from donor hair to premium synthetic styles